How-to Tuesday: Adding a Dispatch In The TruckLogics App

Once you’ve downloaded the free TruckLogics mobile app, you can access tons of our great features, no matter where you are.
As a fleet manager or owner-operator, even if you’re away from the office, you can still create dispatches and update new assignments.
As a driver on the road, you can still check in with dispatch to see any new assignments.
Follow these simple instructions or watch this video to learn how to create and view dispatches from the TruckLogics mobile app. (If you don’t know how to download the app, use these easy instructions.)
Creating a Dispatch Video Tutorial
Creating a dispatch
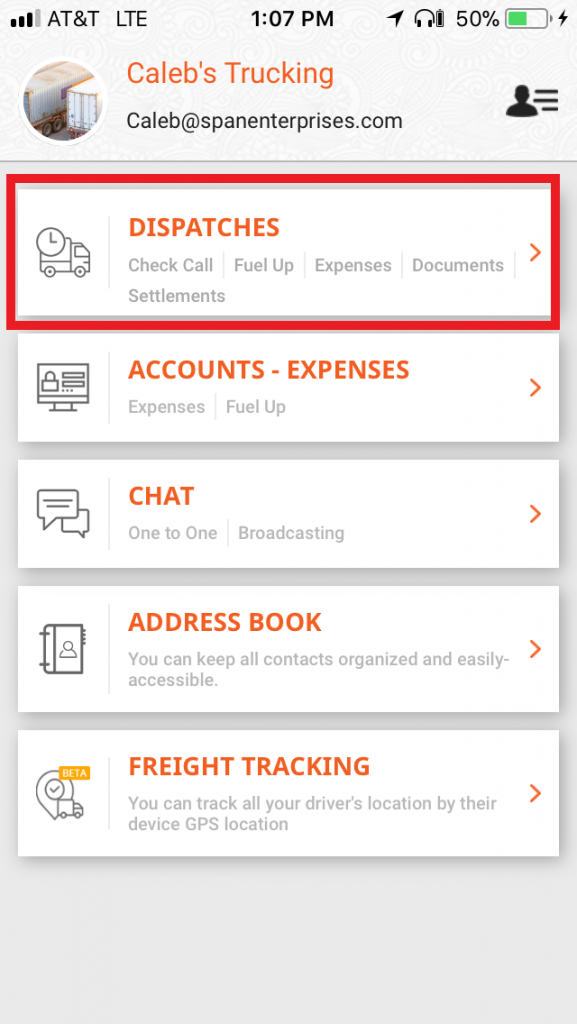
- From your “Dashboard”, tap “Dispatches”.
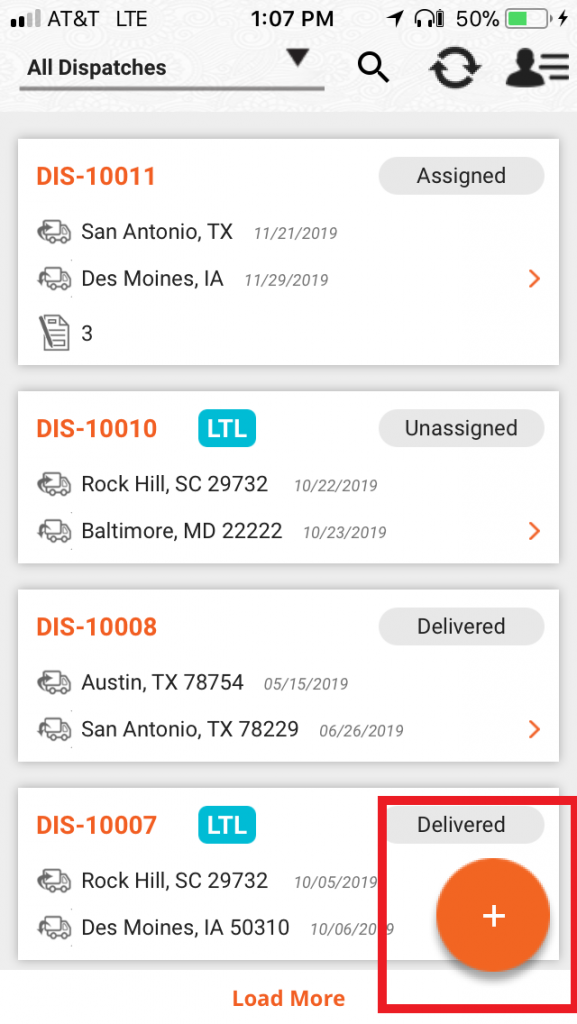
- Tap the orange plus sign in the bottom right corner.
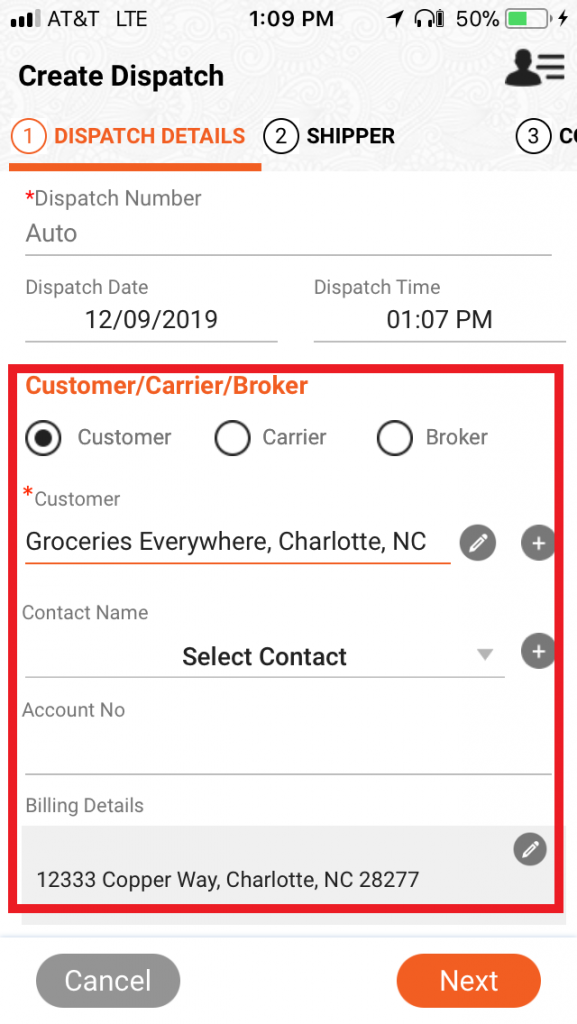
- Select who you are billing to haul the load (customer, carrier, or broker) and enter their business information for billing purposes.
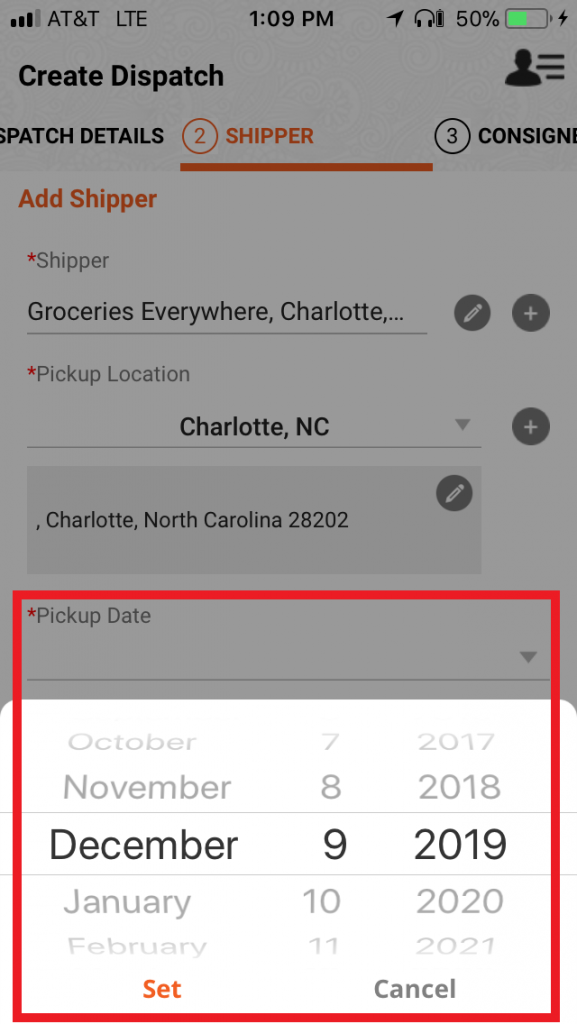
- Add a Pickup date. Optionally, you can add pickup instructions.
- Tap “Save”.
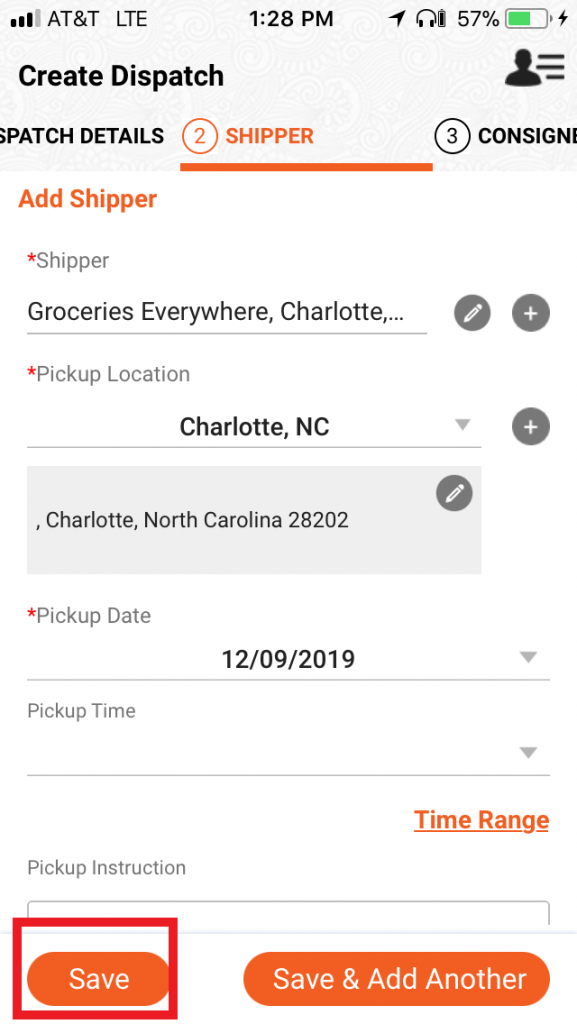
- Check shipper information and tap “Next”.
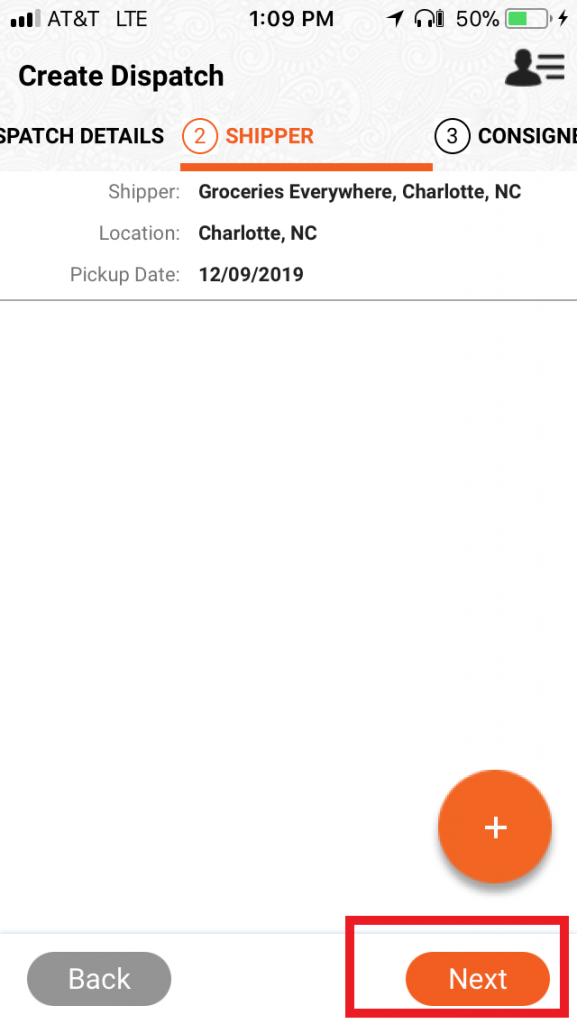
- Add Consignee information and delivery date. Tap “Save”.
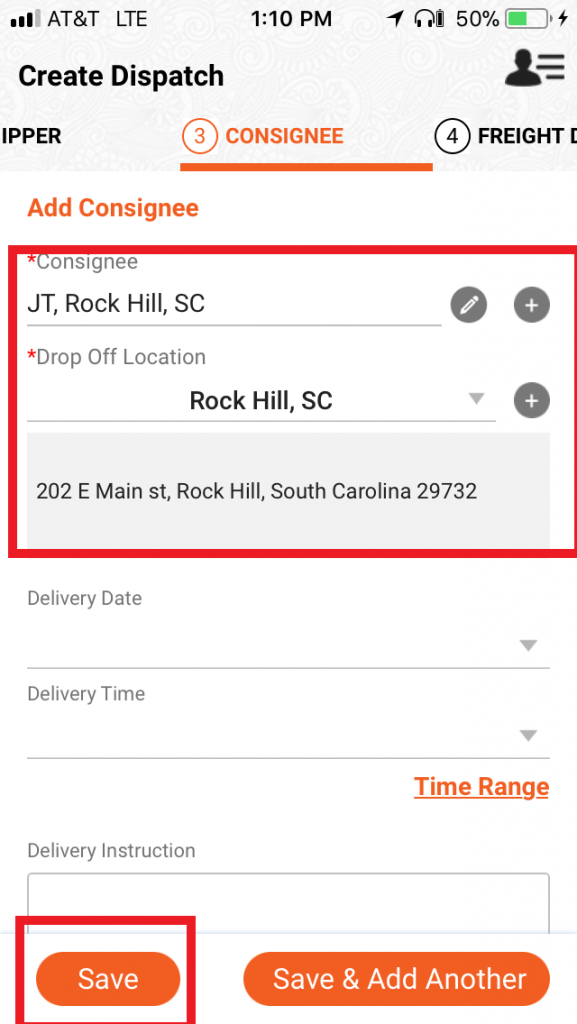
- Check consignee information and tap “Next”.
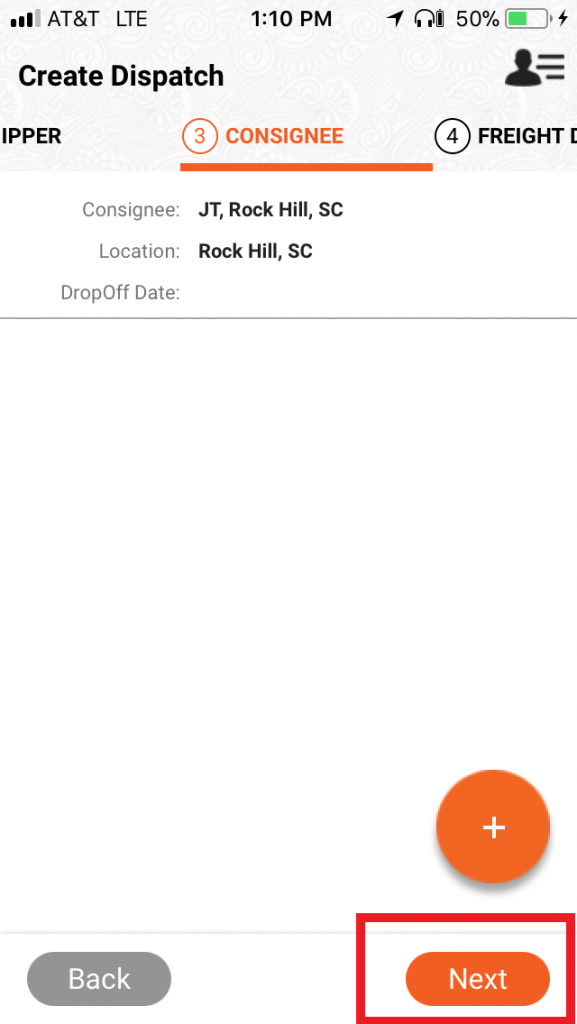
- Add freight details (Optional). This will enable TruckLogics to calculate fees if you are changing by weight and create a bill of lading (BOL) later if needed. Tap “Next”.
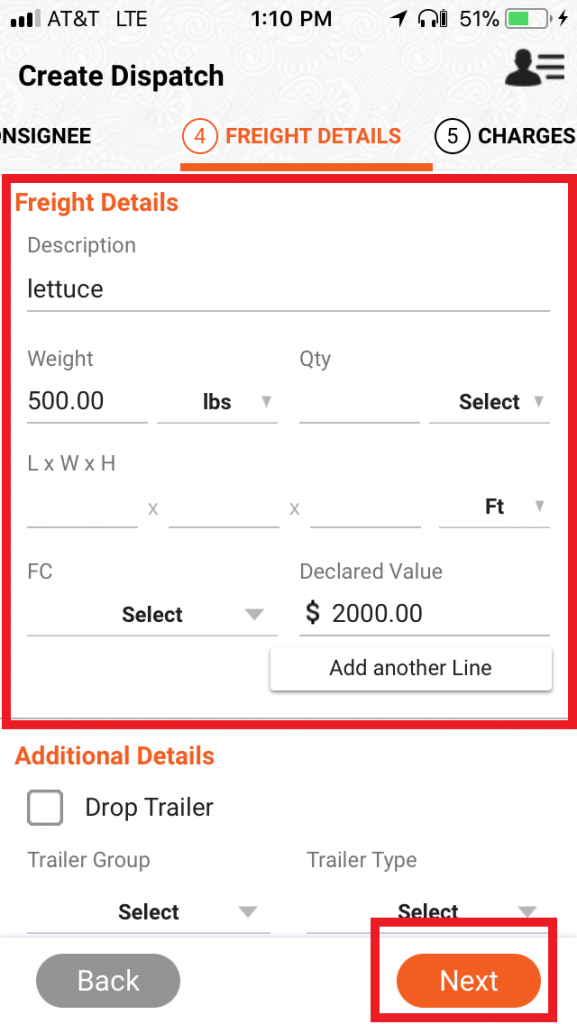
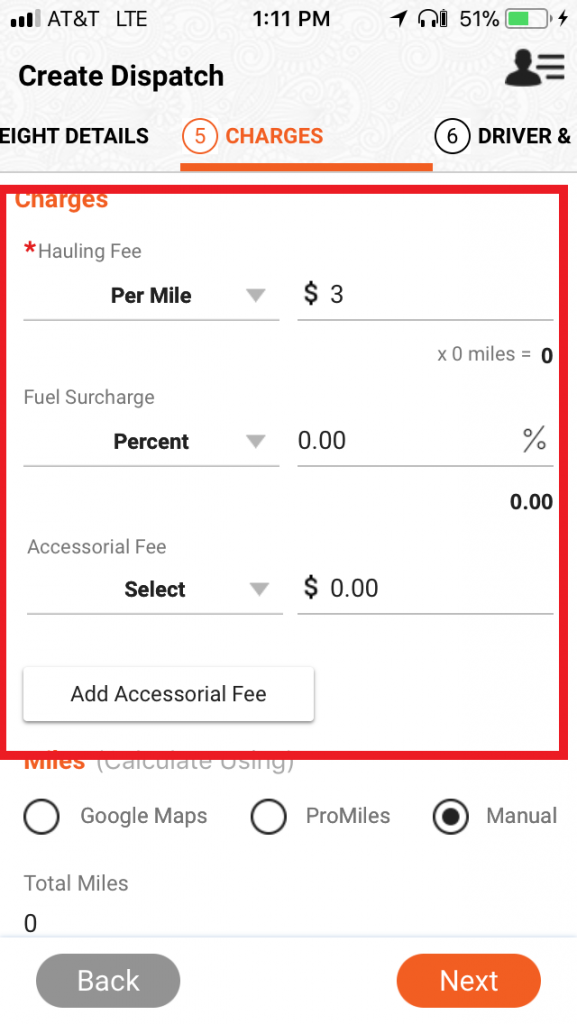
- Add charge information, whether Flat Fee, Per Mile, etc.
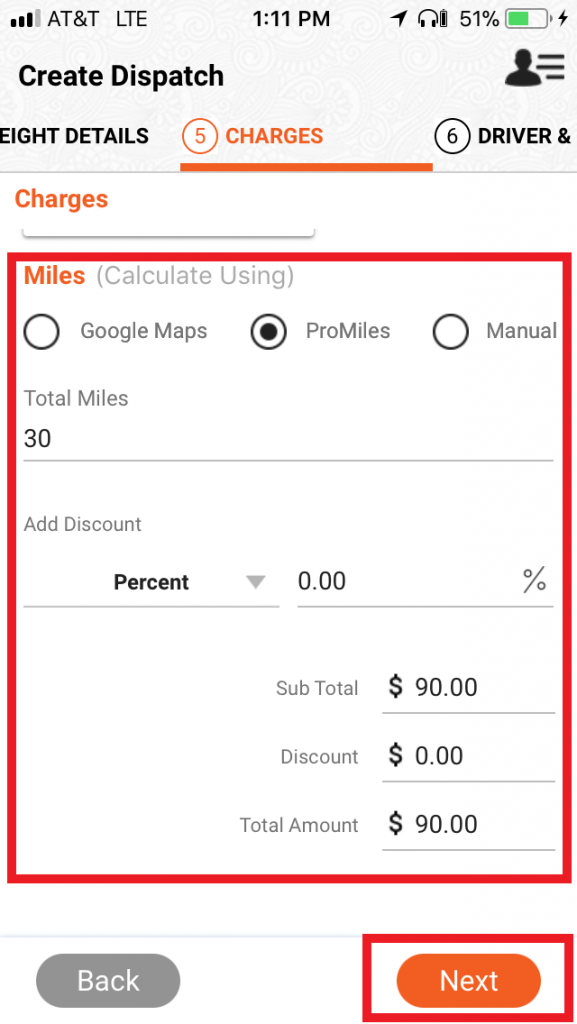
- Calculate mileage using google maps or ProMiles. This lets TruckLogics output Per Mile charge calculations. Tap “Next”.
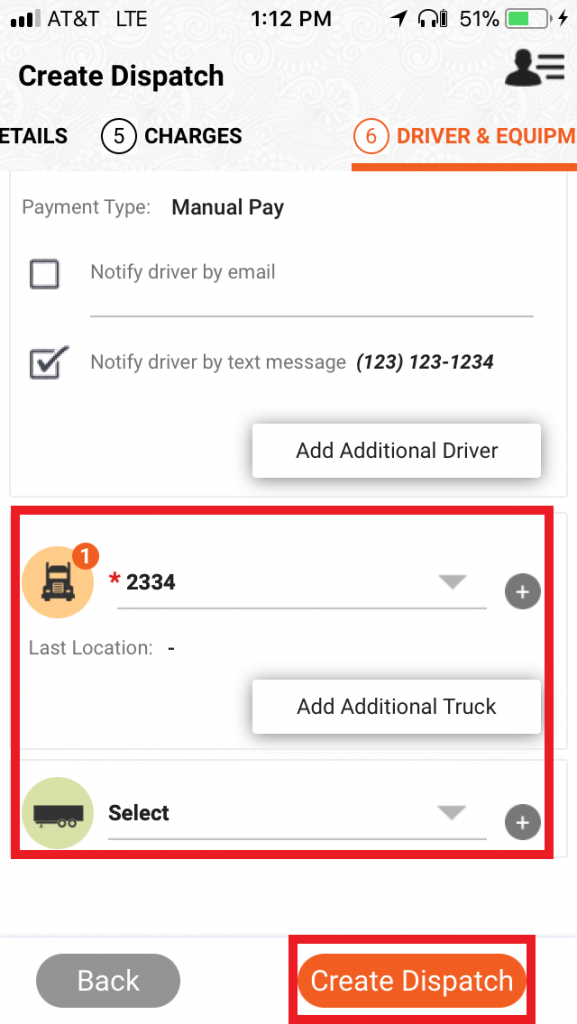
- Assign a driver, they will be automatically updated about their new assignment. You can also enter their email address or phone number.
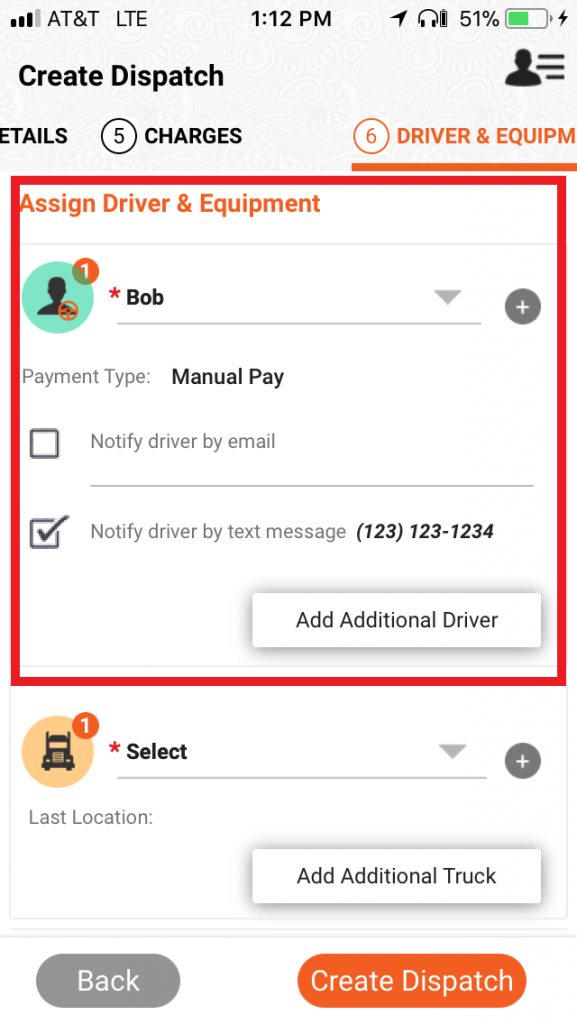
- Assign a truck and/or trailer (optional). Once all your desired information is entered, tap “Create Dispatch”.
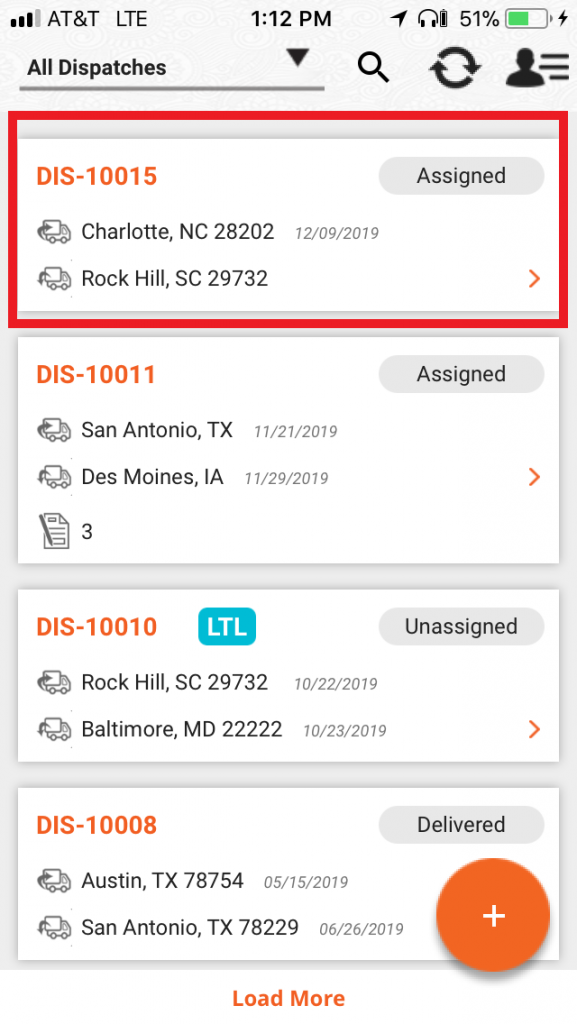
- From the Dispatch summary screen, tap on your newly created dispatch.
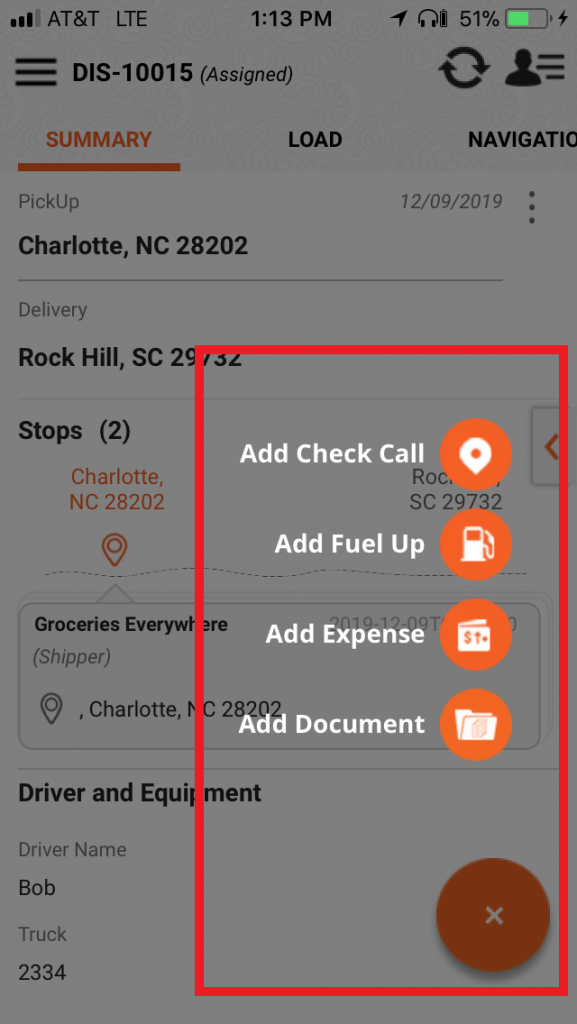
- Tap the plus sign to add Check Calls, Fuel Ups, Expenses, or Documents.
You’re all set!
Check-in on the Web version
Now that you have created a dispatch from the mobile app, all the information will be available to you from wherever you access TruckLogics. To help you see, sign in to TruckLogics on a computer and follow these instructions.
- From your “Dashboard”, click the “Dispatches” tab.
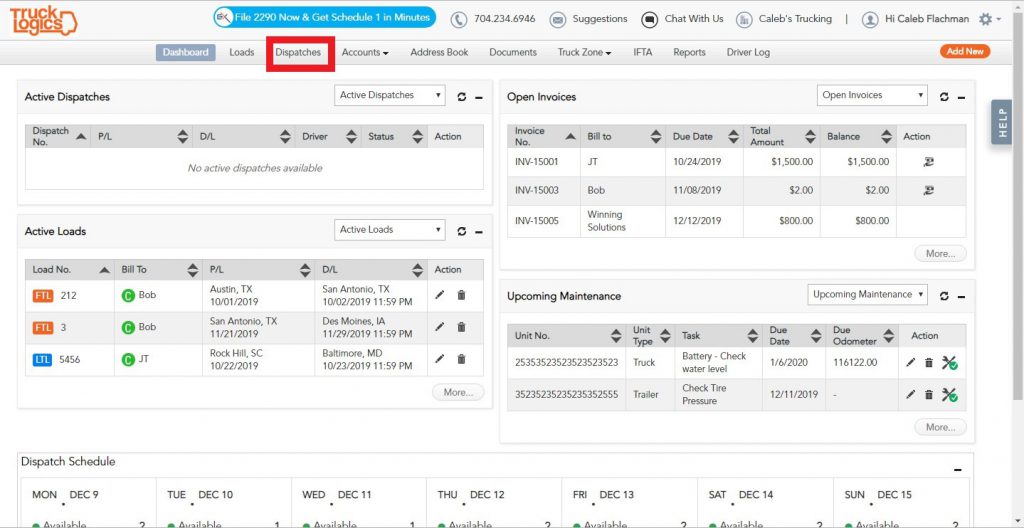
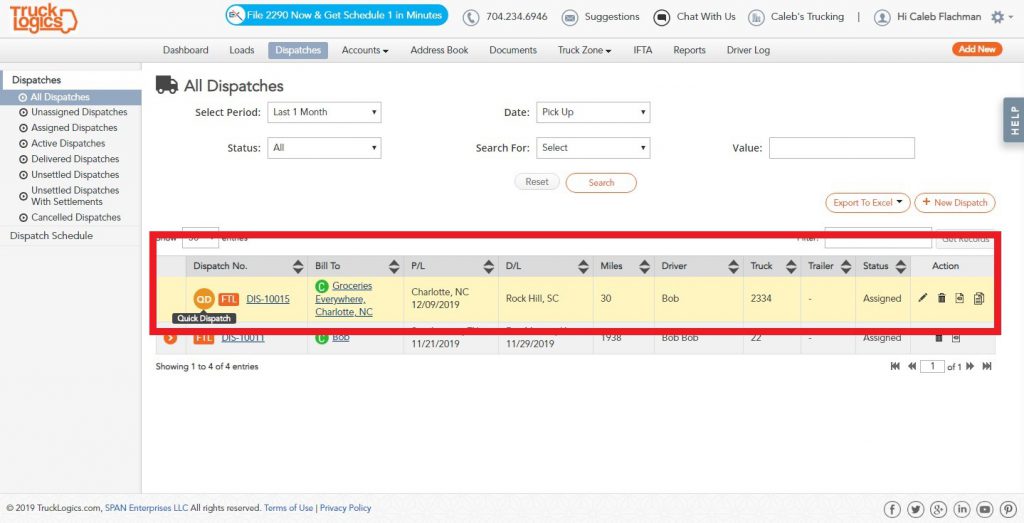
- Notice that the dispatch created in the mobile app is marked with “QD” for “Quick Dispatch” so that you can keep your records straight. Click on the load you just made.
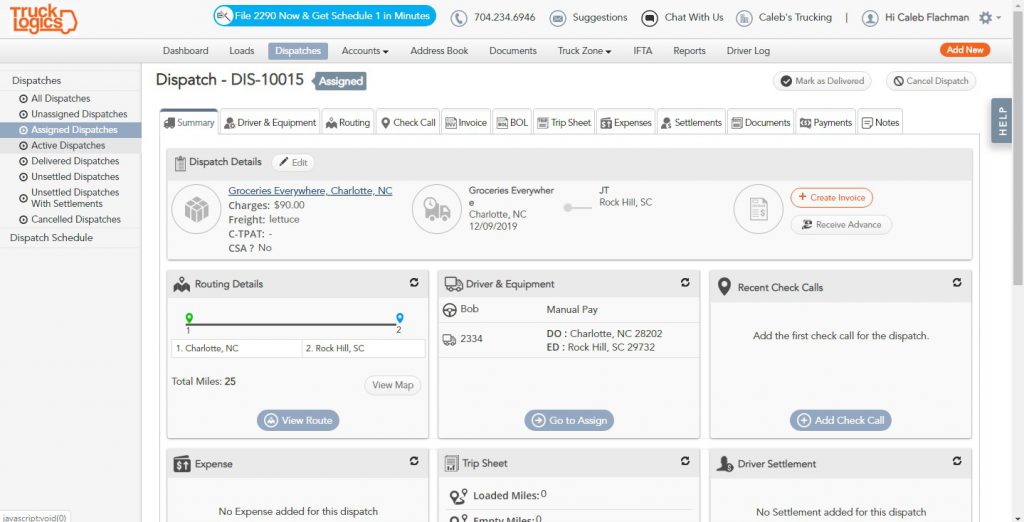
- From this screen, you can add expenses, add settlements, generate invoices, make BOLs, and much more.
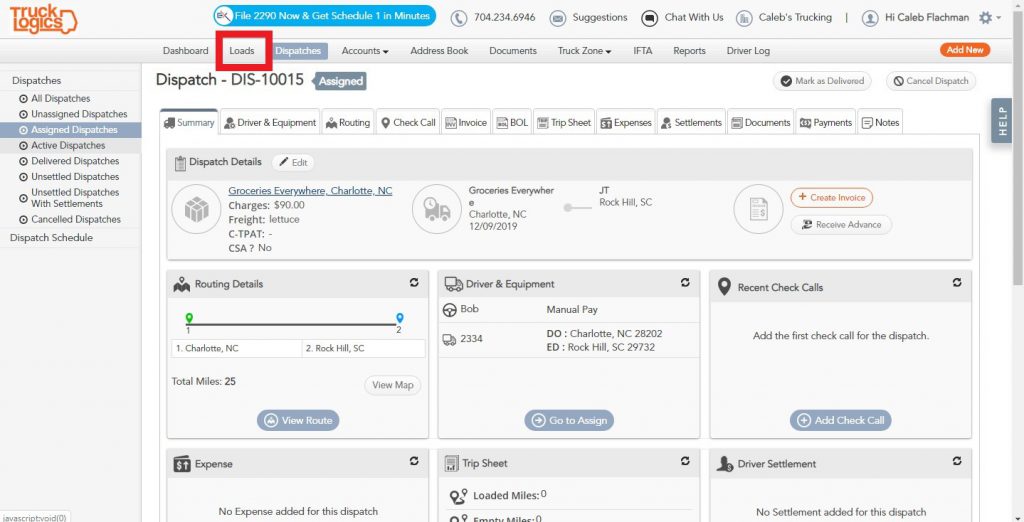
- Click the “Loads” tab.
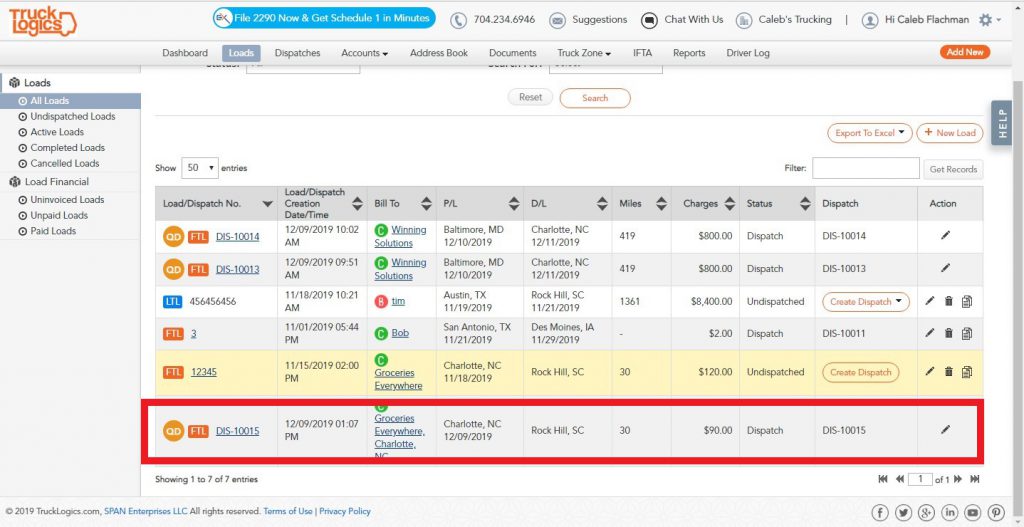
- Notice that your mobile dispatch still comes up even though there is no associated load.
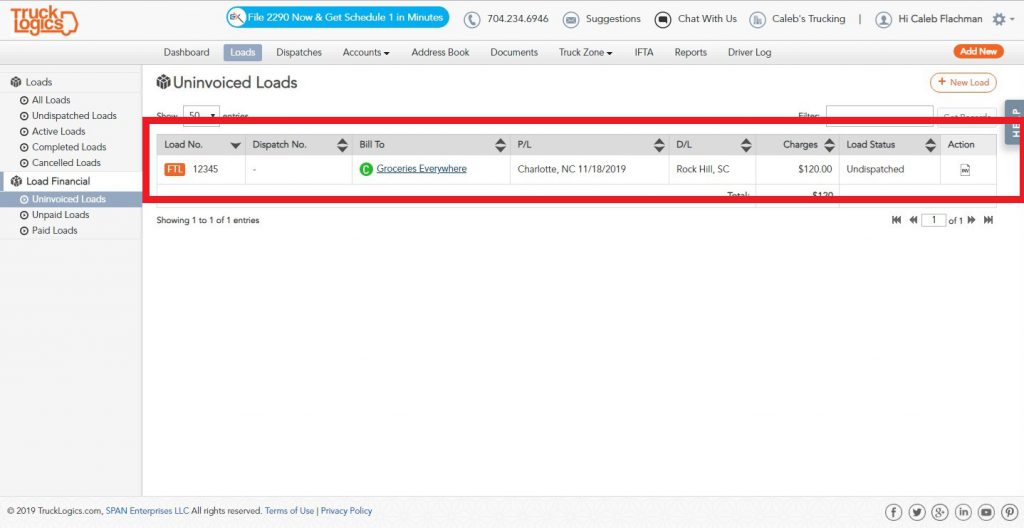
- Click “Uninvoiced Loads” under “Load Financial”.
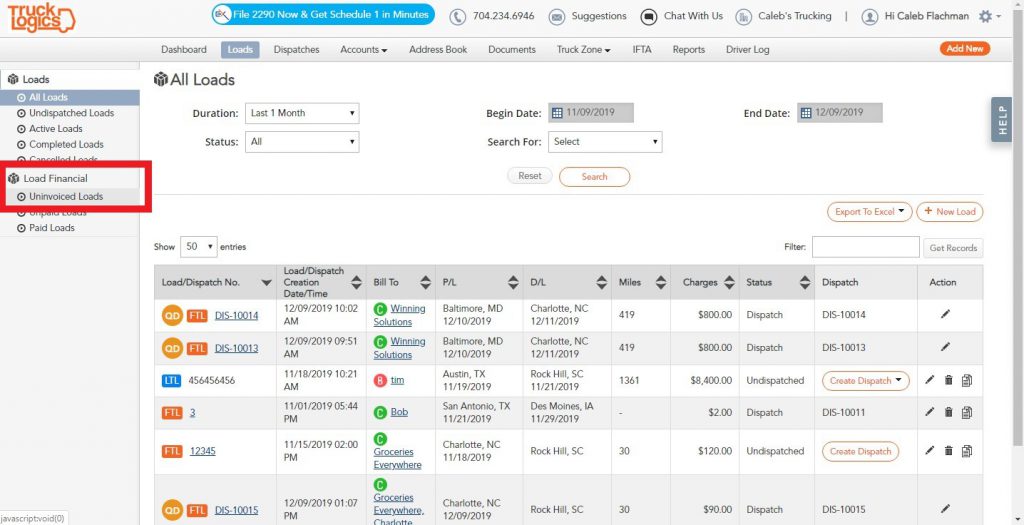
- From this screen, you can view all the mobile dispatches you have created, but not yet invoiced.
Give TruckLogics a Try!
You can test-drive TruckLogics for 15 days free of charge! There’s no obligation and no credit card information required.


