How-to Tuesday: Adding a Fuel Expense
reading time: 2 minute(s)
When you add your fuel expenses to TruckLogics, you can make your record keeping, payroll, and IFTA reporting even easier!
The information you supply with each of your fuel expenses can be used to generate reports and calculate payroll deductions for your drivers.
Plus, you’ll know exactly how much you’re spending on fuel!
Here’s how to quickly add a trucking fuel expense in TruckLogics!
Adding a Fuel Expense
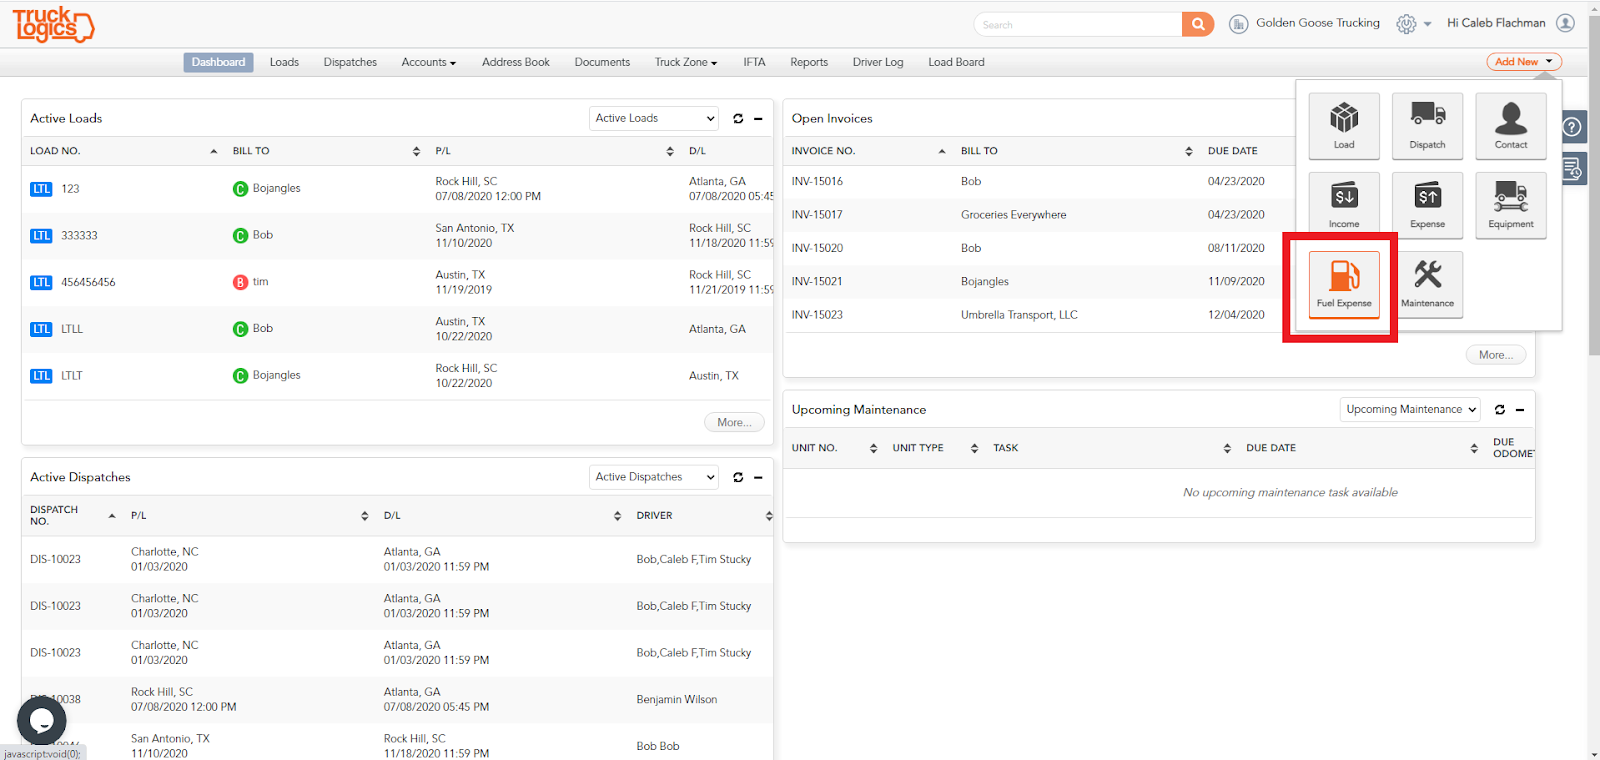
- From your dashboard, select “Fuel Expense” from the “Add New” drop-down menu.
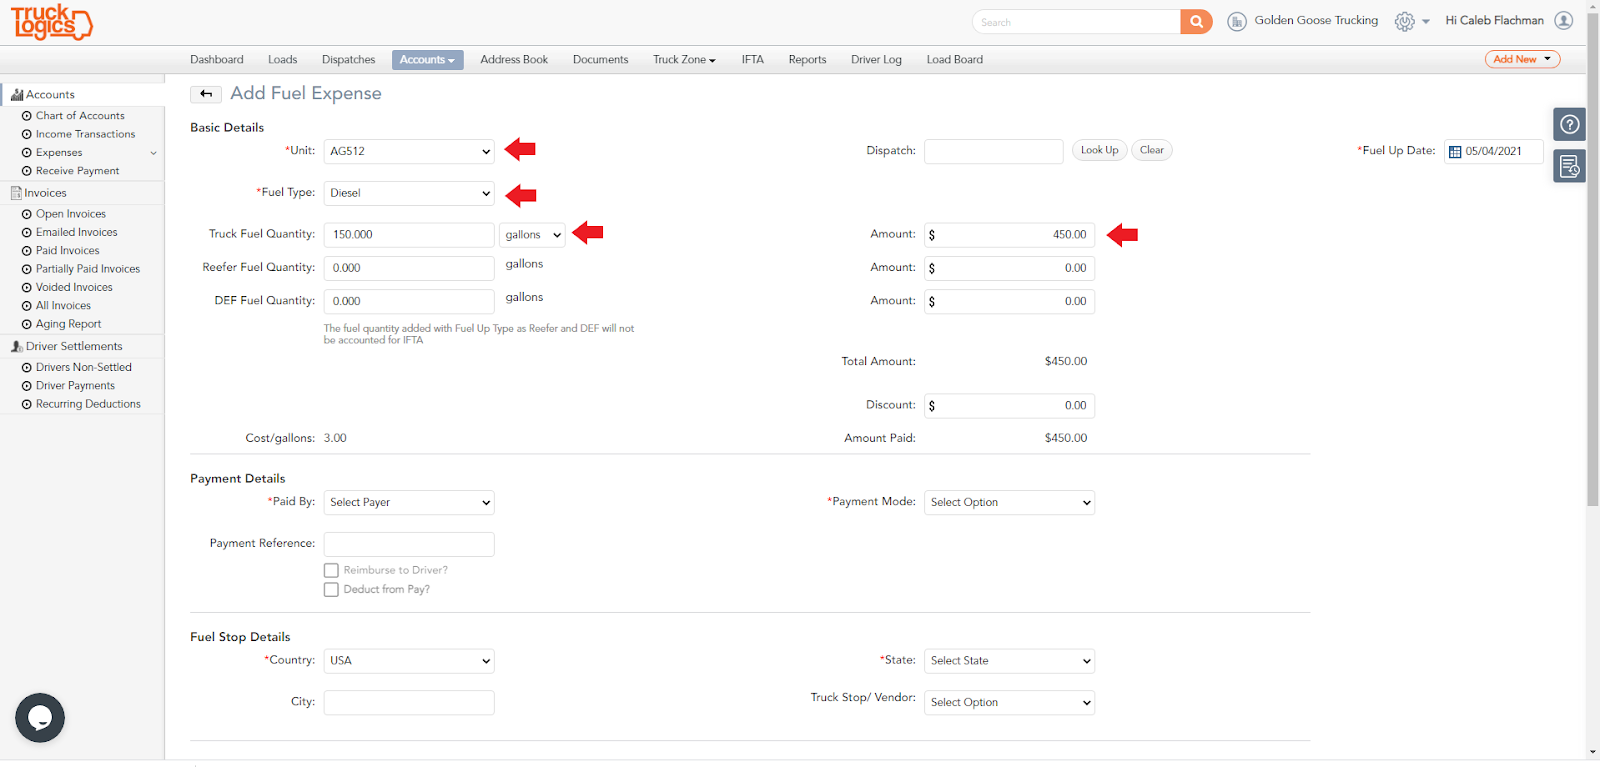
2. Add the truck for which you purchased the fuel and the type of fuel. Optionally, you can add fuel quantities and purchase amounts.
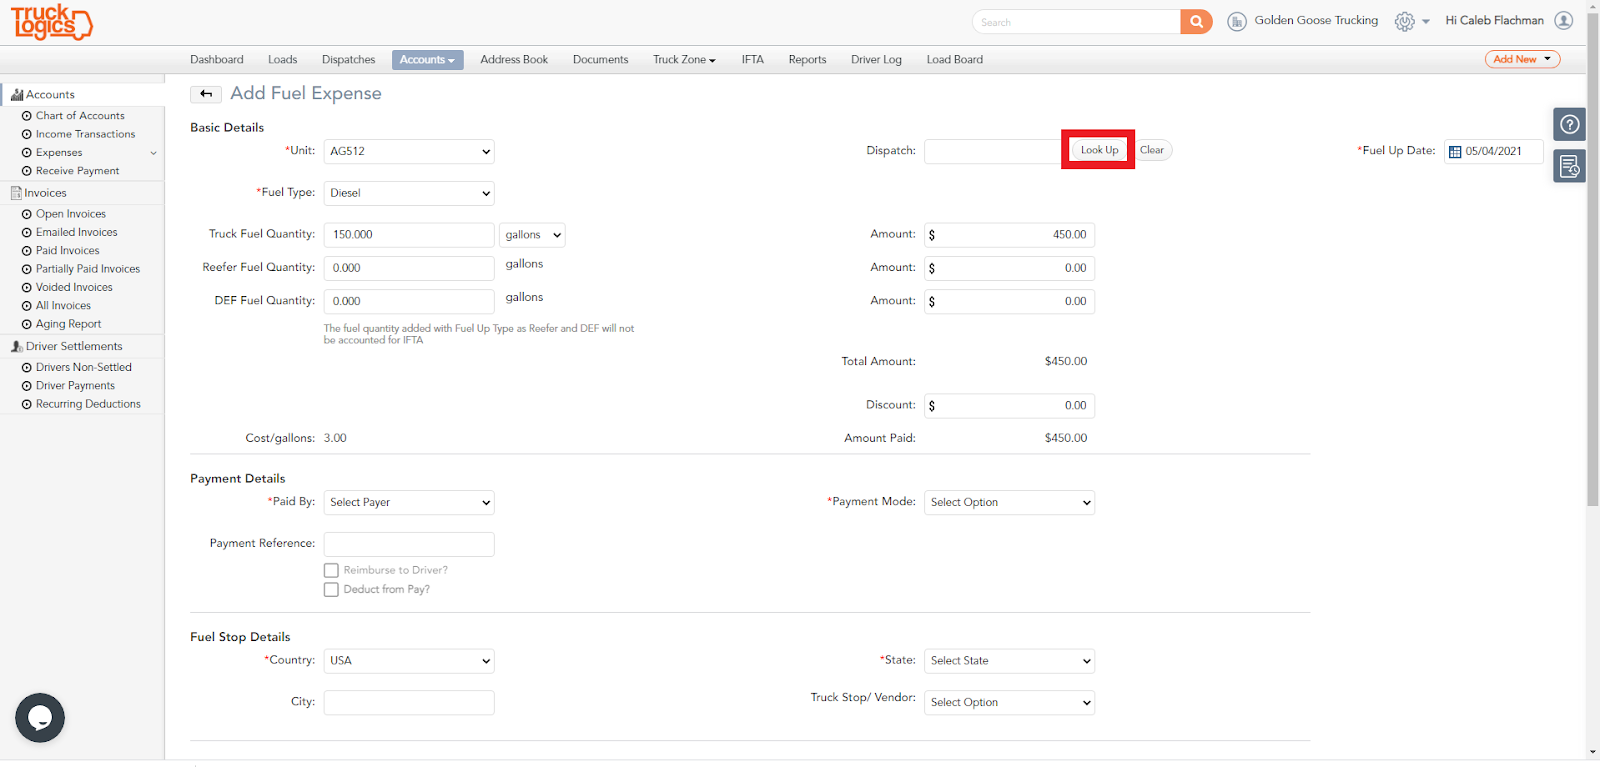
3. You can also attach this fuel expense to a particular dispatch for easy record keeping. To do this, click the “Look Up” button in the top right corner.
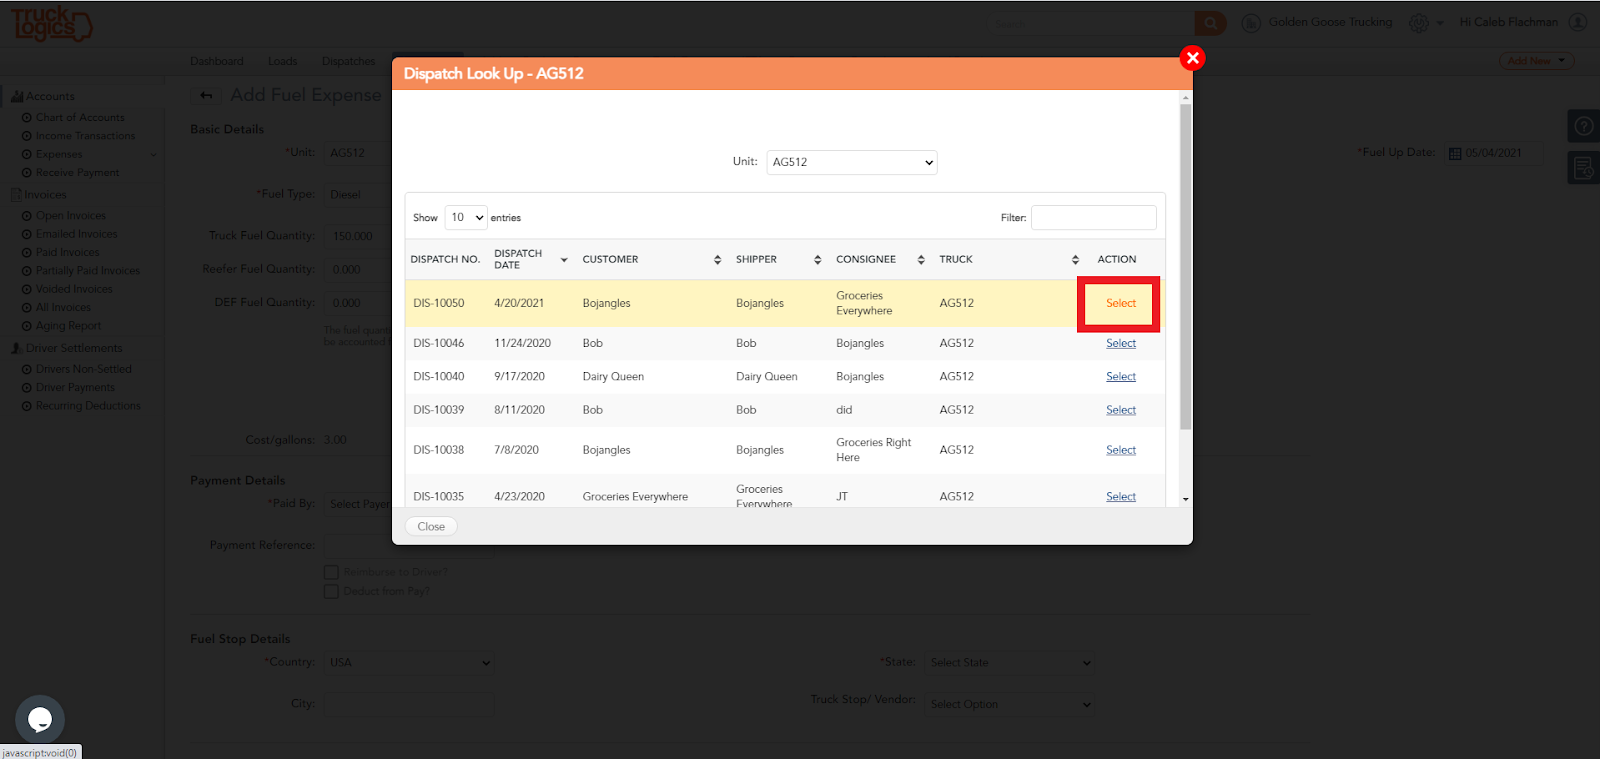
4. Then choose the Dispatch you would like to attach this expense to from your records.
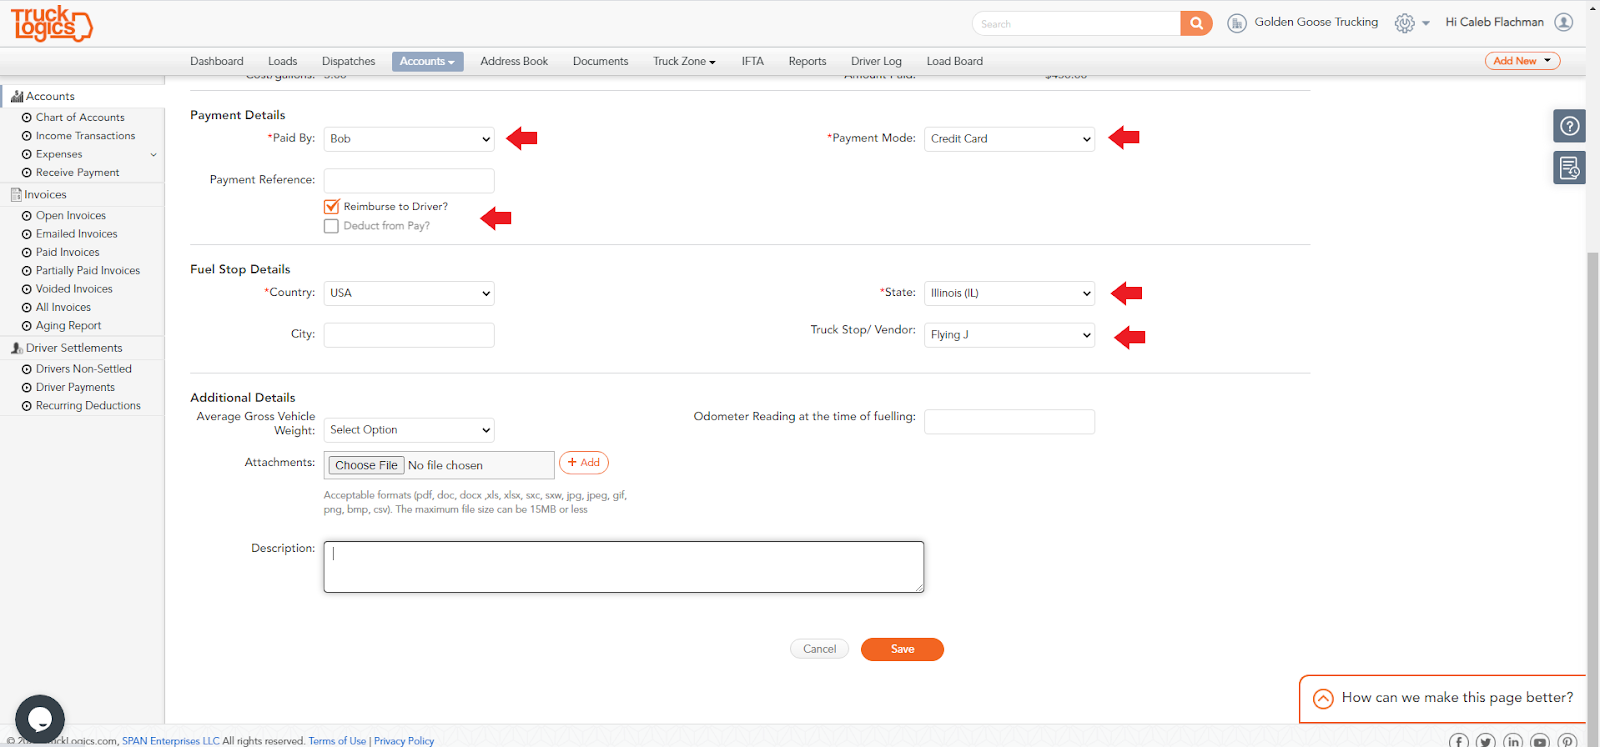
4. Next, enter who made the fuel purchase, how they paid and the location of the dispatch. You can optionally choose to reimburse this expense to a driver or deduct from their pay.
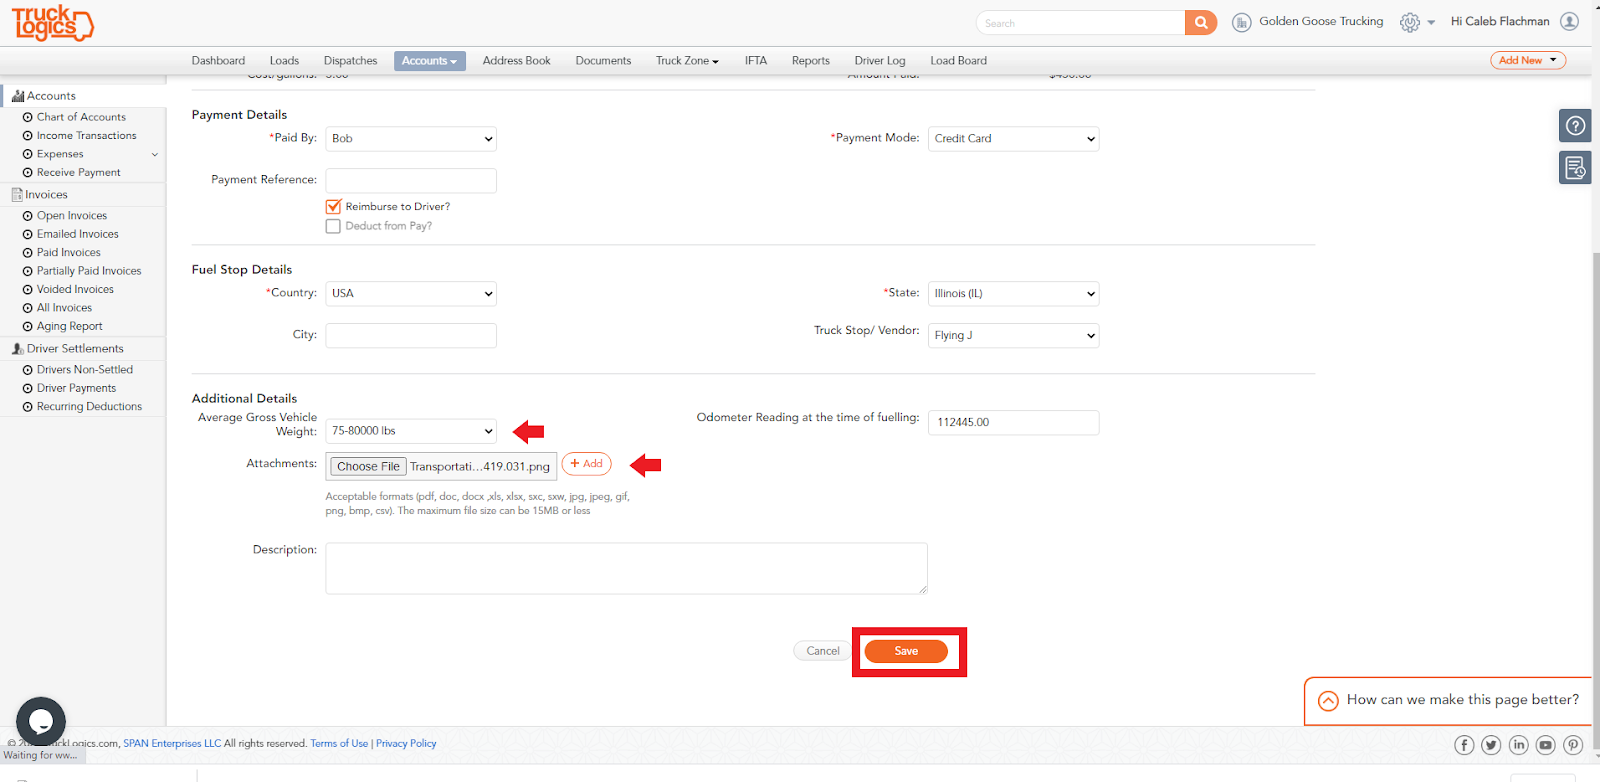
5. Finally, you can add additional details like vehicle weight, odometer reading at the time of purchase, and even attach a copy of the receipt. When you are finished, click “Save”.
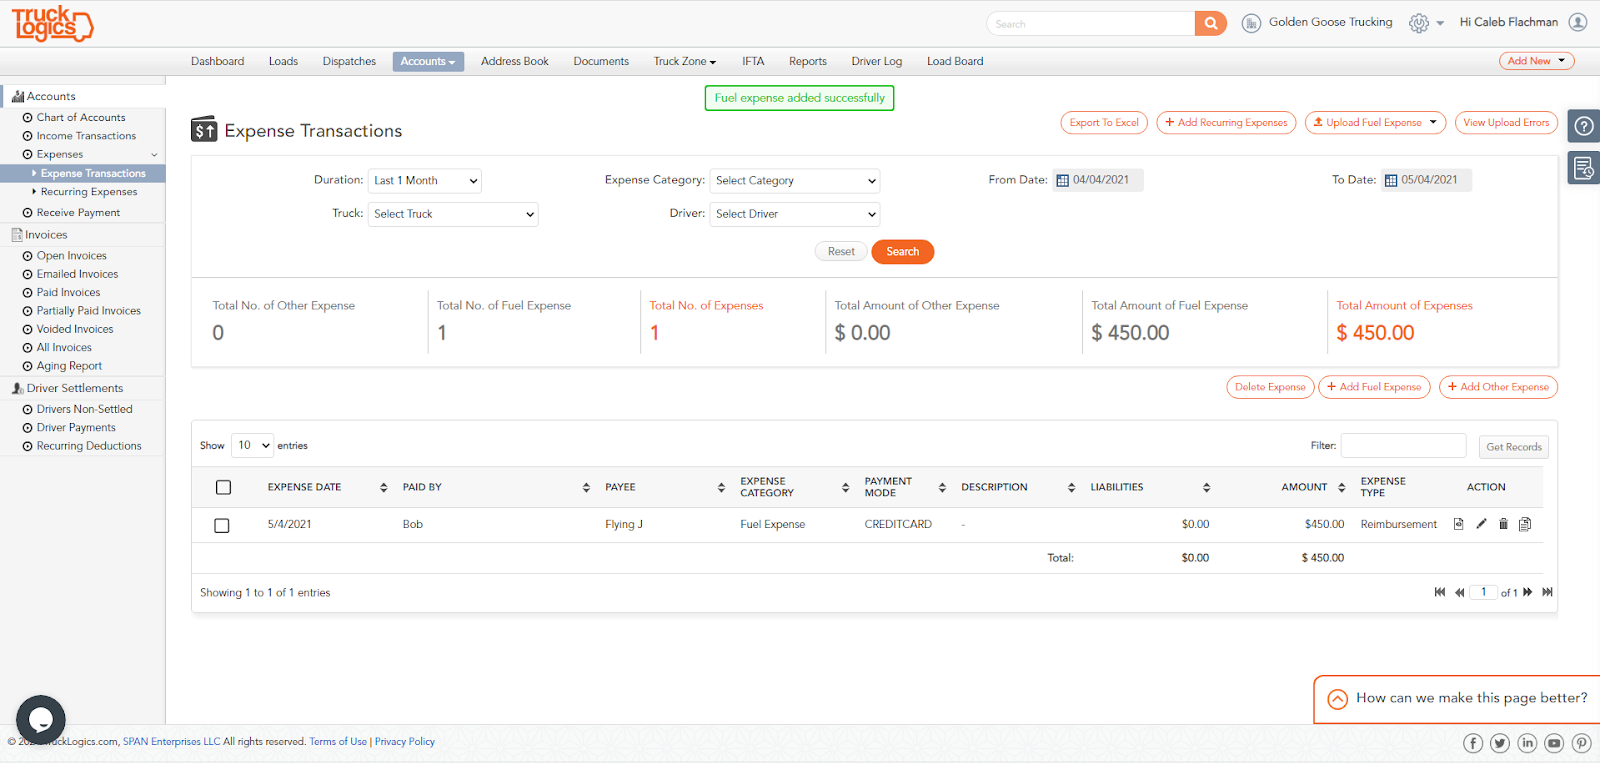
6. Your fuel expense has been added!
Want to track your fuel expenses in TruckLogics?
Get a 15-day free trial of TruckLogics to see what it can do for you! There’s no obligation and no credit card information required!

Leave a Comment