How-to Tuesday: Easily Switch Trucks and Drivers Mid-Trip
reading time: 4 minute(s)
Truck dispatching in the real world can be complicated.
While creating a truck dispatch, you might have to deal with complicated situations like Less-Than-Truckload (LTL) and switching trucks and drivers mid-trip.
You need a trucking dispatch software that can keep with you in your everyday operations.
Thankfully, TruckLogics can handle whatever you throw at it. Harnessing TruckLogics’ powerful reporting features will help you effectively manage your time and money.
Learn how to switch trucks and drivers mid-trip with TruckLogics by following these simple steps.
Switching trucks and drivers mid-trip
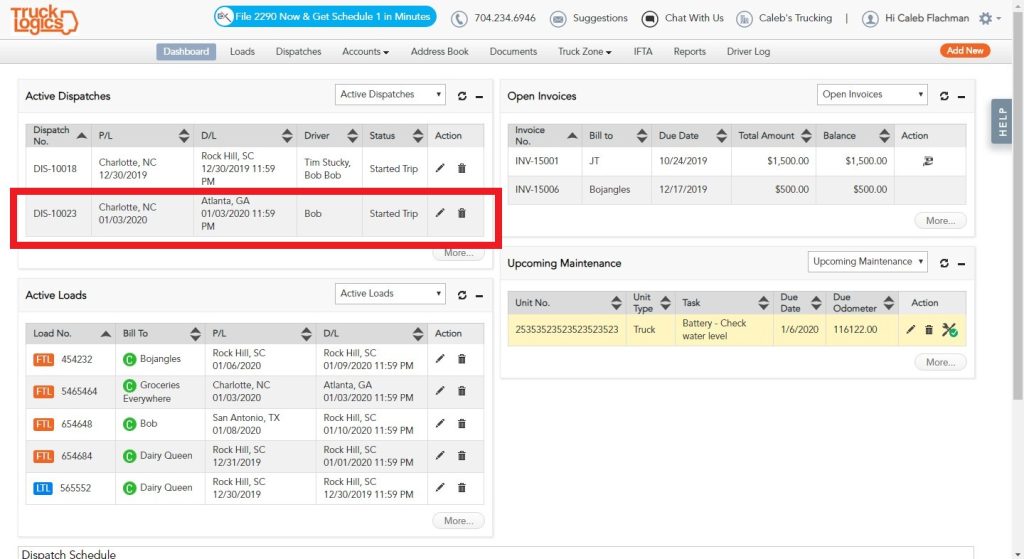
1. From your Dashboard, click on an active dispatch that is currently en route.
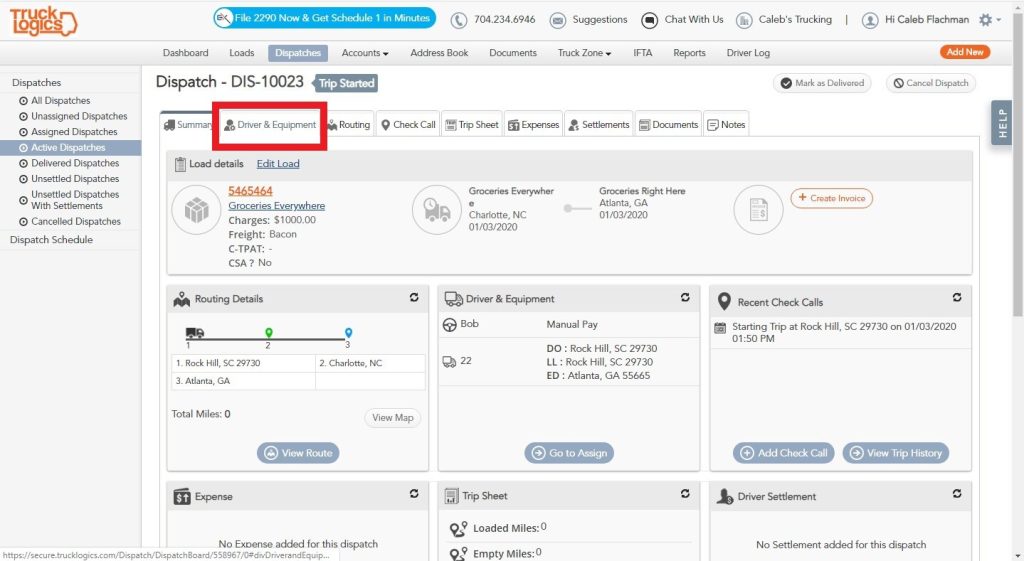
2. Click the Driver & Equipment tab.
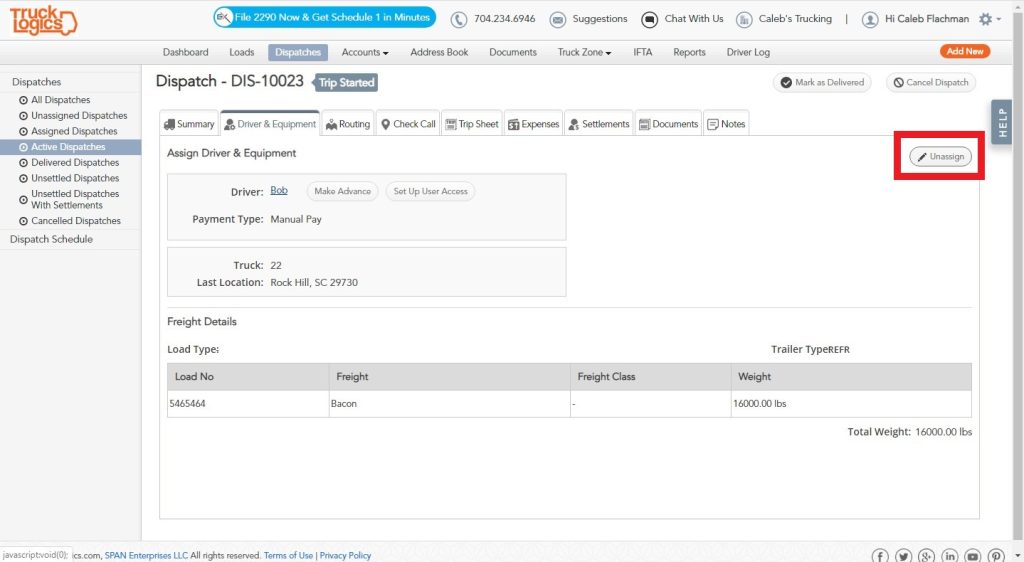
3. Click “Unassign”.
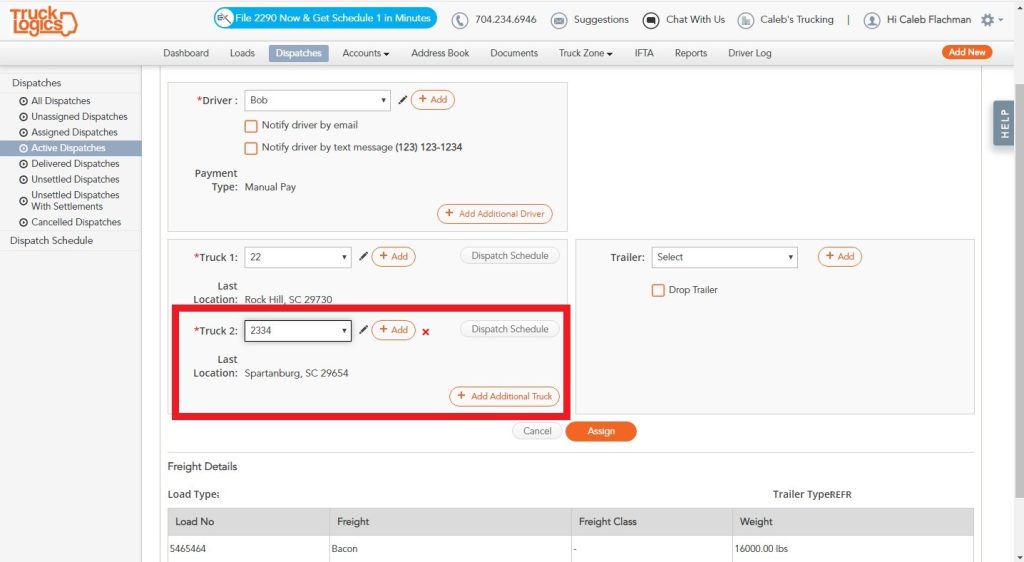
4. In the Truck box, click “Add Additional Truck”.
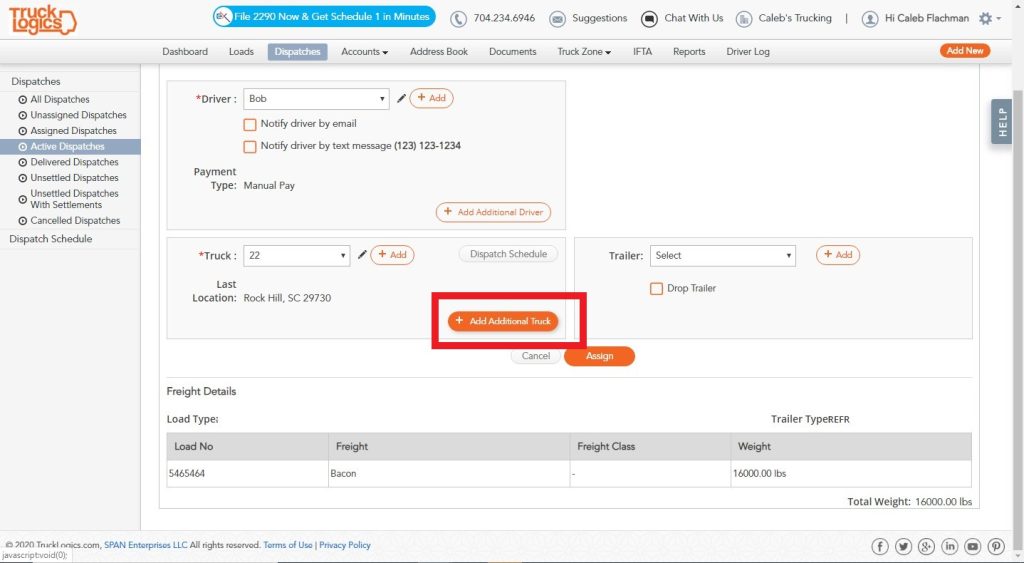
5. Select a truck from the list of available trucks or add a new one.
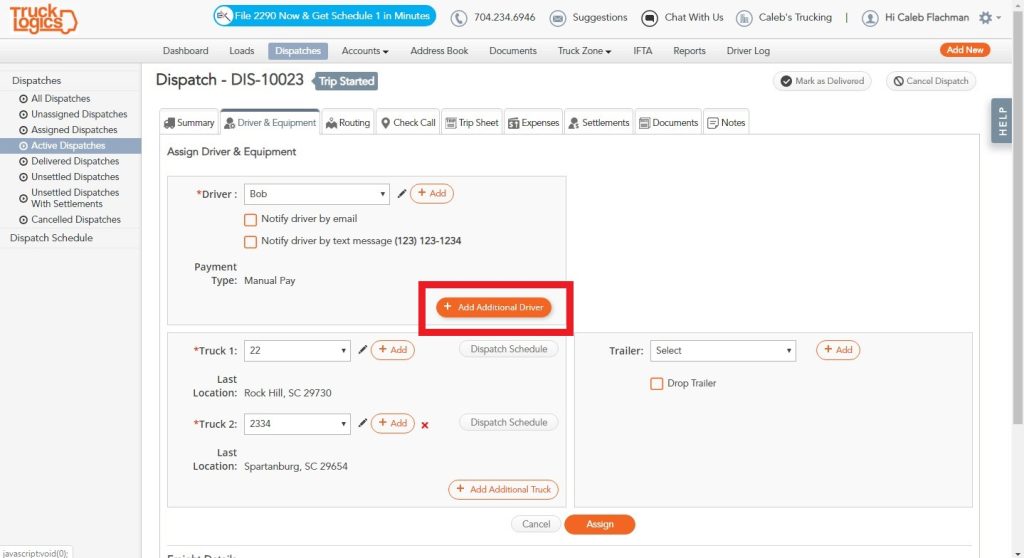
6. In the Driver box, click “Add Additional Driver”.
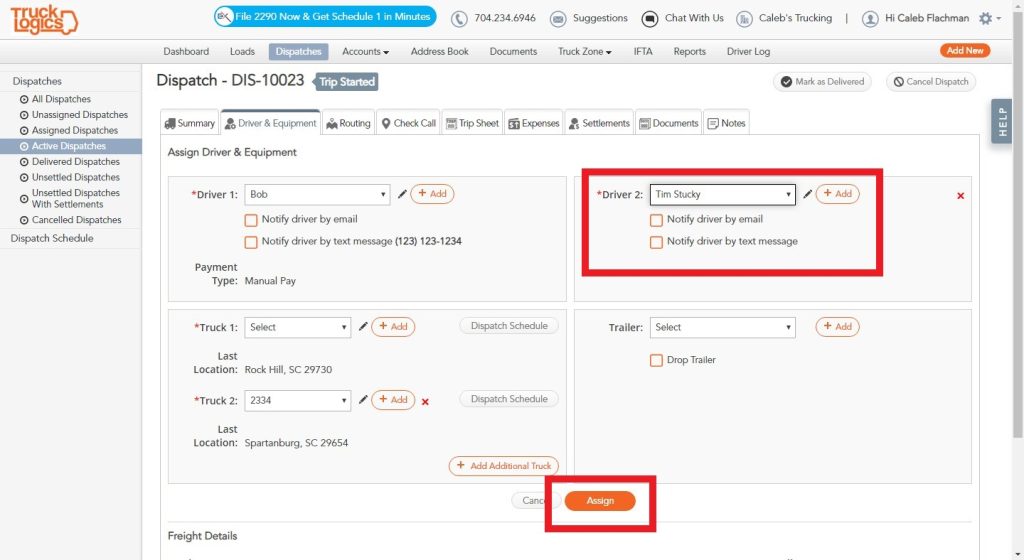
7. Select the driver from the list of available drivers or add a new one. Click “Assign” at the bottom of the page to save your changes.
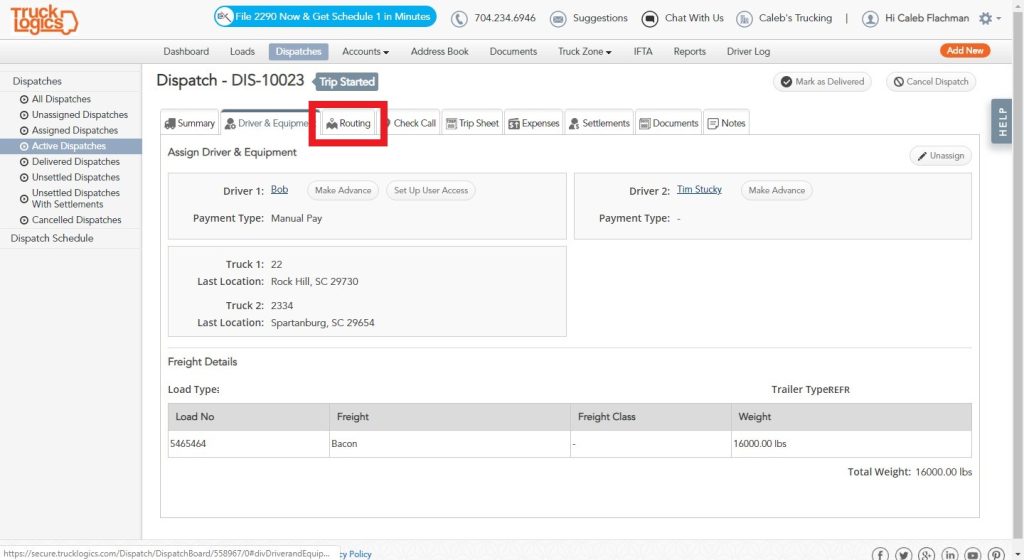
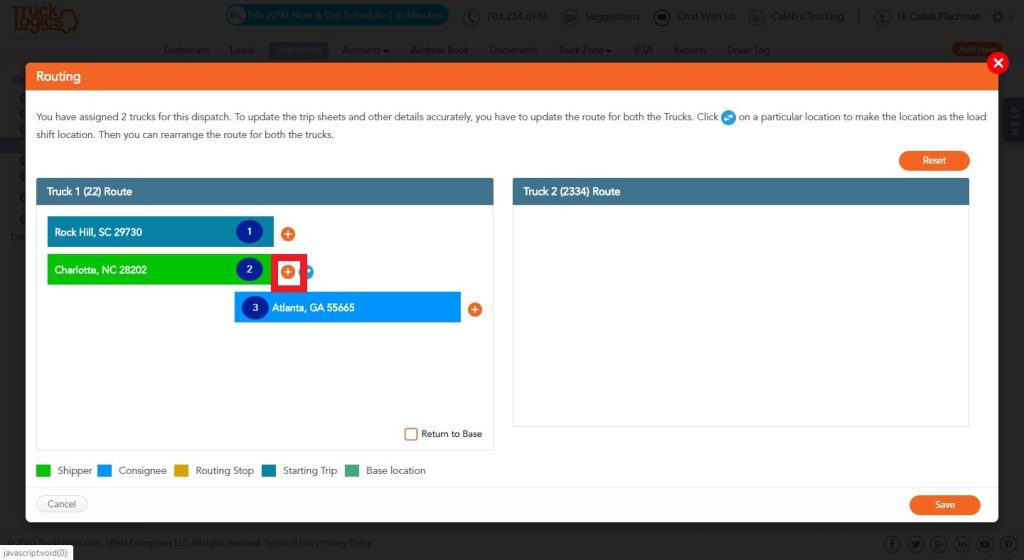
8. Go to the Routing tab.
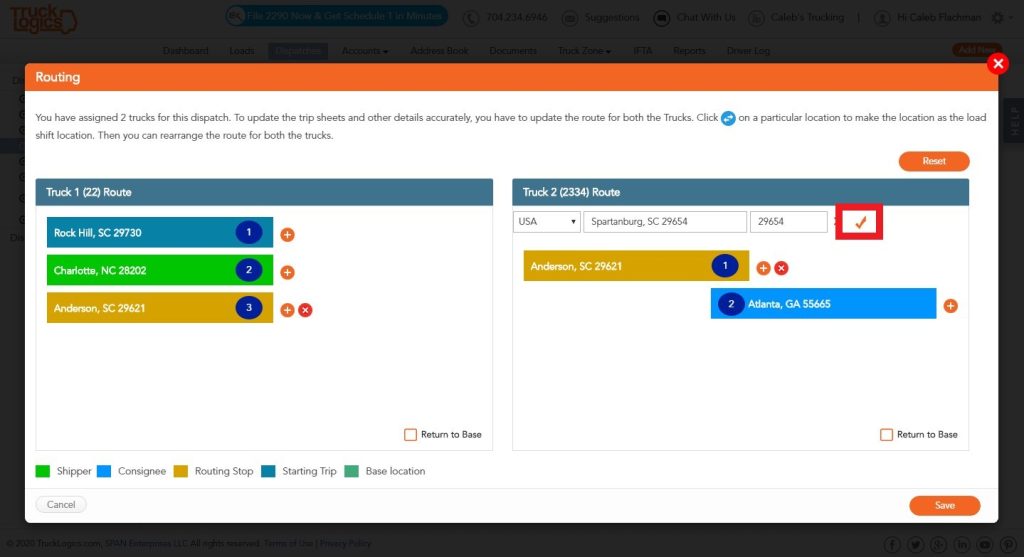
9. Click the plus symbol that is next to your pickup location.
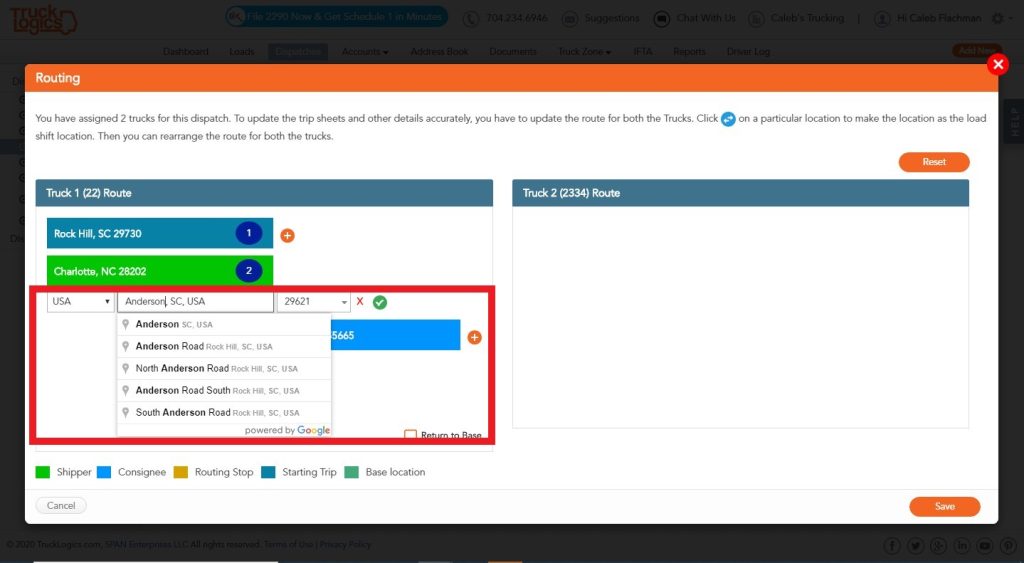
10. Add the location where the first and second trucks will meet. Click the green checkmark when finished.
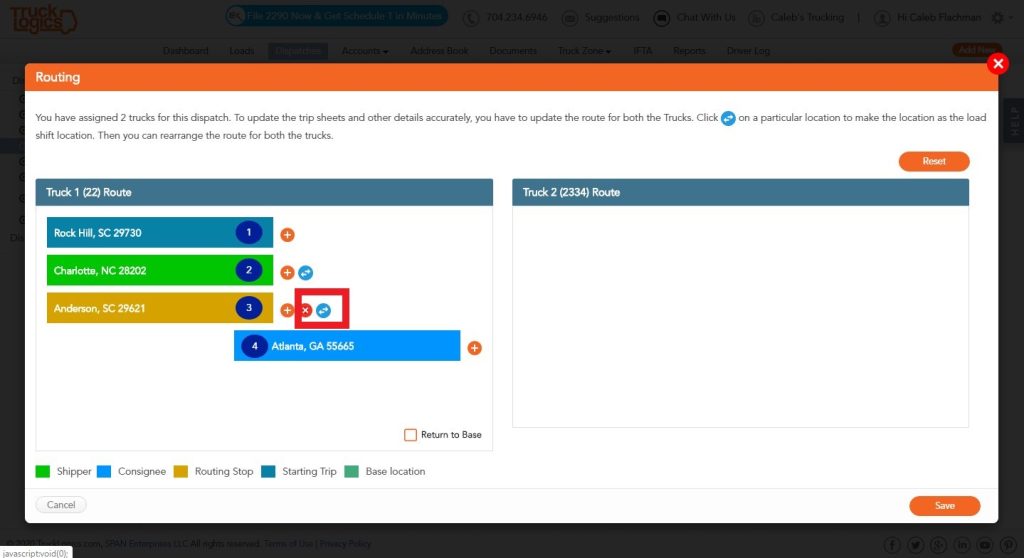
11. Click the blue arrows next to the exchange location. This will give the second half of the route to the second truck and driver.
12. Now, click “Add Start Location” for the second truck.
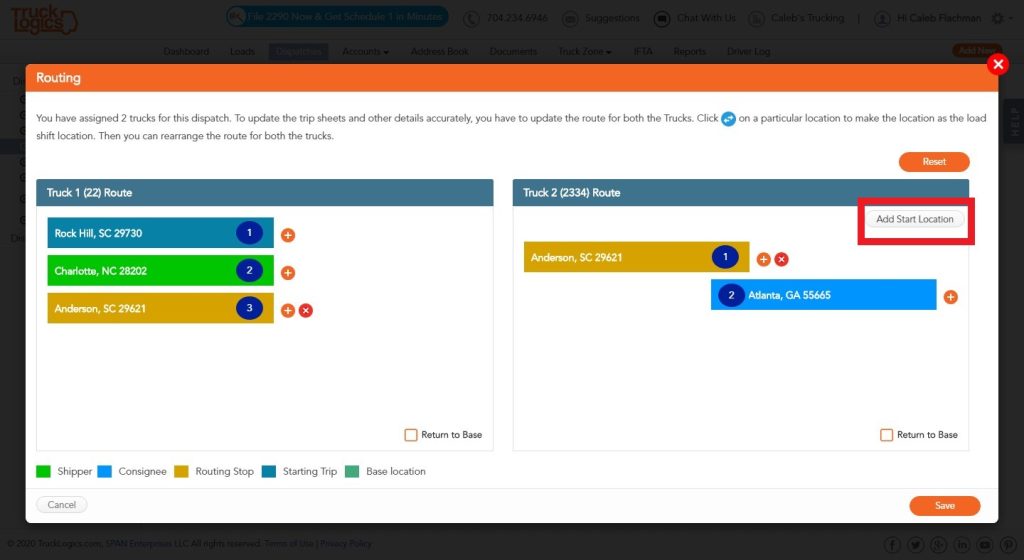
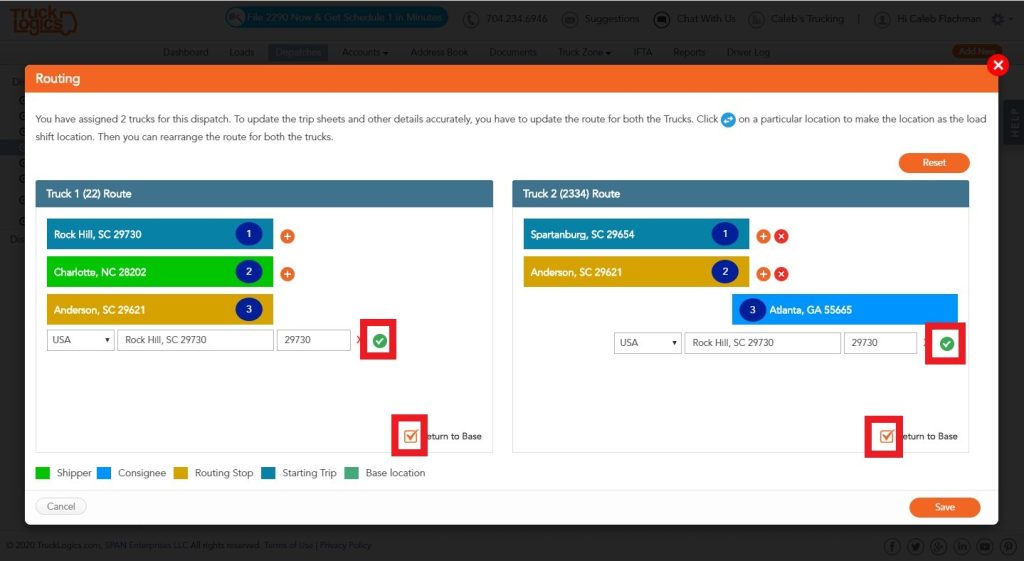
13. Add the starting location (TruckLogics will add the truck’s last known location by default) and click the orange checkmark.
14. Check the “Return to Base” boxes for both trucks and click the green checkmark next to your home base location.
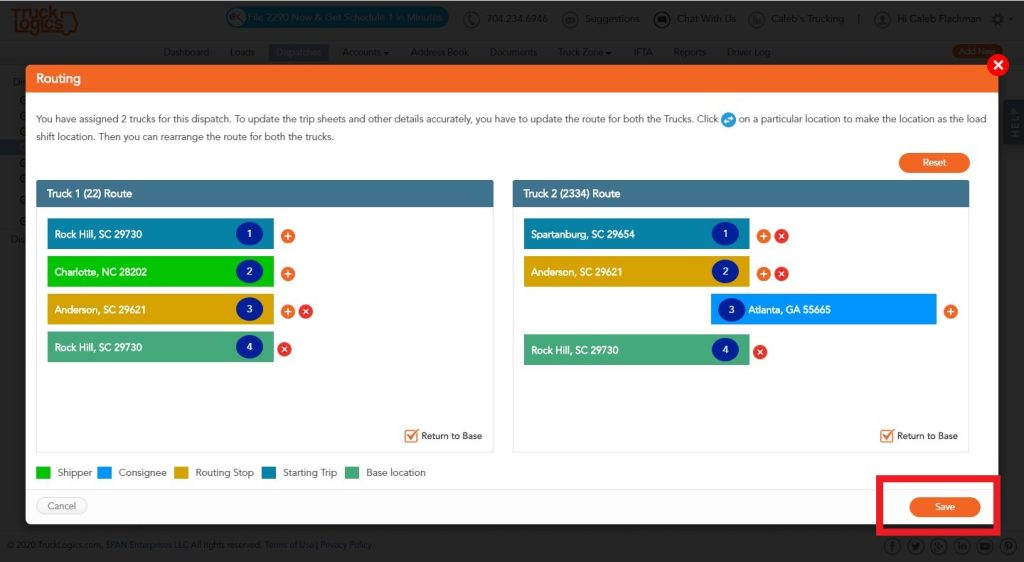
15. Click “Save”.
16. Return to the Summary tab to see all of your new information in one place.
That’s it! You’re finished switching trucks and drivers!
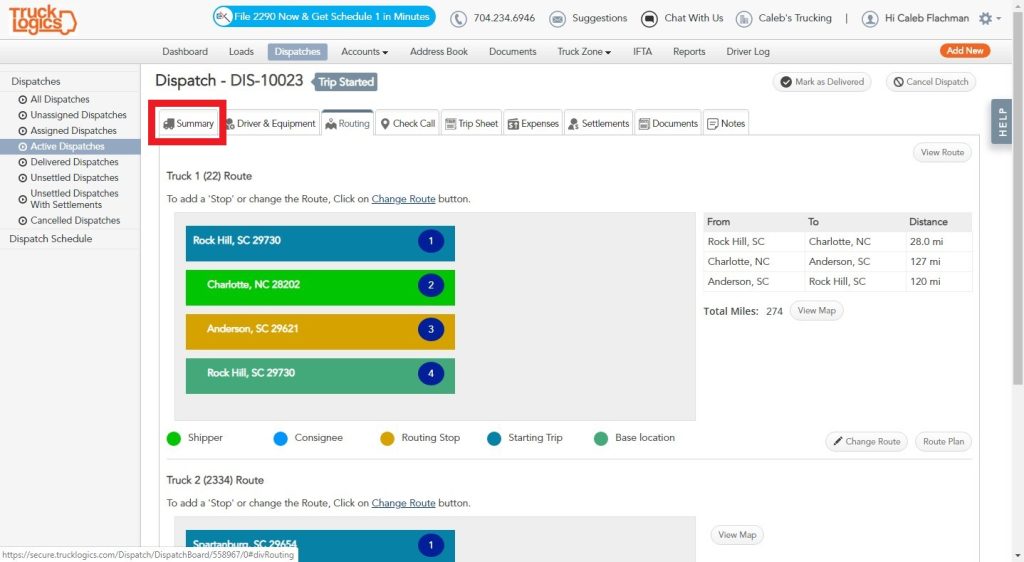
17. You will now be able to populate a trip sheet for both Truck 1 and Truck 2. Both trucks will now be associated with this dispatch.
Try these features for free!
We know you’ll save time and money with TruckLogics, but don’t just take our word for it. Get a 15-day free trial of TruckLogics today! There’s no obligation and no credit card information required.

Want to learn more about TruckLogics?
Want to learn more about how TruckLogics can help you? Check out this full list tutorials.
gfuxsntxoiuxvqzutxiugxgdegjjgl
I appreciate how you always take the time to explain things so clearly.
Your content is always so engaging and easy to follow.
Order Lorazepam online
Trusted Website to Buy Adderall Online
Purchase Adderall Online
Purchase Adderall Online
you are truly a just right webmaster The site loading speed is incredible It kind of feels that youre doing any distinctive trick In addition The contents are masterwork you have done a great activity in this matter
I was suggested this web site by my cousin Im not sure whether this post is written by him as no one else know such detailed about my trouble You are incredible Thanks
whwfsinzmpwvjhpoygitddoqjskplg
What i dont understood is in reality how youre now not really a lot more smartlyfavored than you might be now Youre very intelligent You understand therefore significantly in terms of this topic produced me personally believe it from a lot of numerous angles Its like women and men are not interested except it is one thing to accomplish with Woman gaga Your own stuffs outstanding Always care for it up
This was such a valuable and insightful read—thank you!
Hi my family member I want to say that this post is awesome nice written and come with approximately all significant infos I would like to peer extra posts like this
I do not even know how I ended up here but I thought this post was great I do not know who you are but certainly youre going to a famous blogger if you are not already Cheers
I just wanted to express my gratitude for the valuable insights you provide through your blog. Your expertise shines through in every word, and I’m grateful for the opportunity to learn from you.
Your blog is a breath of fresh air in the often mundane world of online content. Your unique perspective and engaging writing style never fail to leave a lasting impression. Thank you for sharing your insights with us.
Hi Neat post There is a problem along with your website in internet explorer would test this IE still is the market chief and a good section of other folks will pass over your magnificent writing due to this problem
Good article—the point about needing solid dispatch software is key. I found a related discussion on https://tinyfun.io/game/merge-conan that touched on how software integration impacts driver efficiency too.
I really enjoyed playing. sweet haunt 2 has some interesting mechanics that keep you coming back for more.
I do trust all the ideas youve presented in your post They are really convincing and will definitely work Nonetheless the posts are too short for newbies May just you please lengthen them a bit from next time Thank you for the post
. Add the starting location (TruckLogics will add the truck’s last known location by default) and click the orange checkmark.
I had no idea switching trucks mid-trip could be this straightforward—clicking “Add Additional Truck” right from the dashboard is a game-changer for unexpected delays. Definitely checking out daily movie game later to unwind after all these logistics!
I’ve been wondering—when you switch drivers mid-trip, does the system automatically update the logs for both drivers, or is that something you still have to adjust manually? Also, just discovered toon toon game, which is totally unrelated but kind of fun after a long day of dispatching.
Love the Paris nightlife recommendations! For anyone planning 3D-printed souvenirs from your trip, a quick glb to obj glb to obj conversion makes it easy to edit models right in your browser.
This is exactly the workflow I was hoping to see—being able to reassign a driver mid-route without losing tracking or load history will save us from having to manually fix logs after a breakdown or delay.
nano-banana2
Switching drivers mid-route sounds great in theory, but does the system automatically recalculate HOS logs accurately when the new driver’s clock is different from the original? I’d be curious if there are any edge cases where manual adjustments are still needed.
nano-bananapro
We tried a mid-route driver swap last month and the biggest headache wasn’t the software—it was the radio handoff. We ended up missing a delivery window because the new driver didn’t get the updated appointment details in time.
seedance2-5