reading time: 2 minute(s)
Have you ever created an expense in TruckLogics but realized that it was put on the wrong dispatch? This tutorial will show you how to switch an expense to a new dispatch!
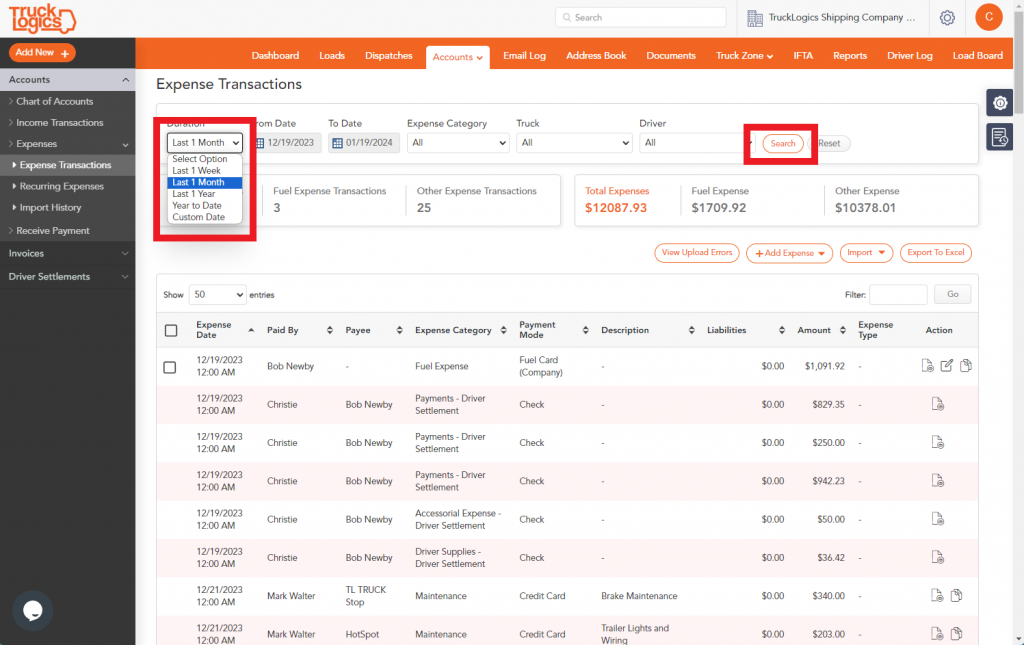
1. From anywhere in TruckLogics click the accounts tab and select Expense Transactions.

2. Select which time frame you want your results to show from. For the purpose of this tutorial, we will select Year to Date. Then click Search.
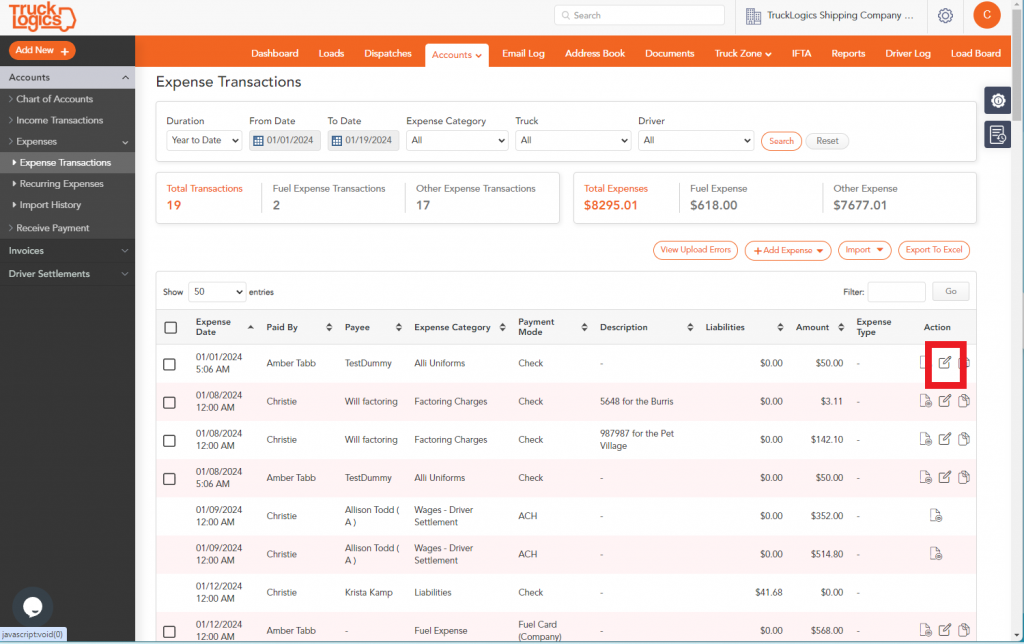
3. Next, you will choose the expense you want to switch to a new dispatch and click on the pencil and paper icon.
4. To change the dispatch you will select “Look up” beside the dispatch box.
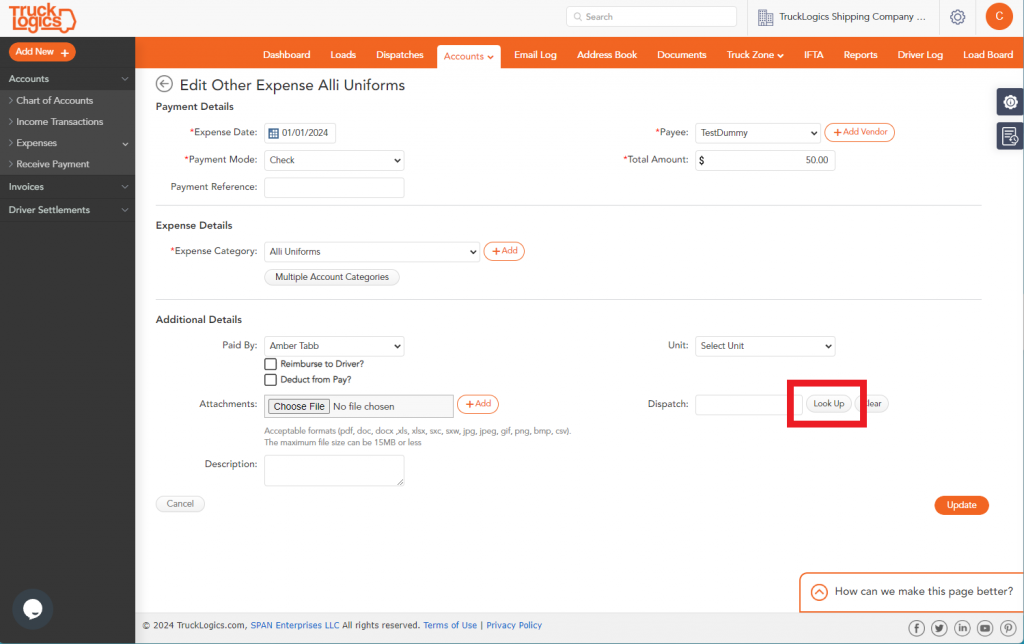
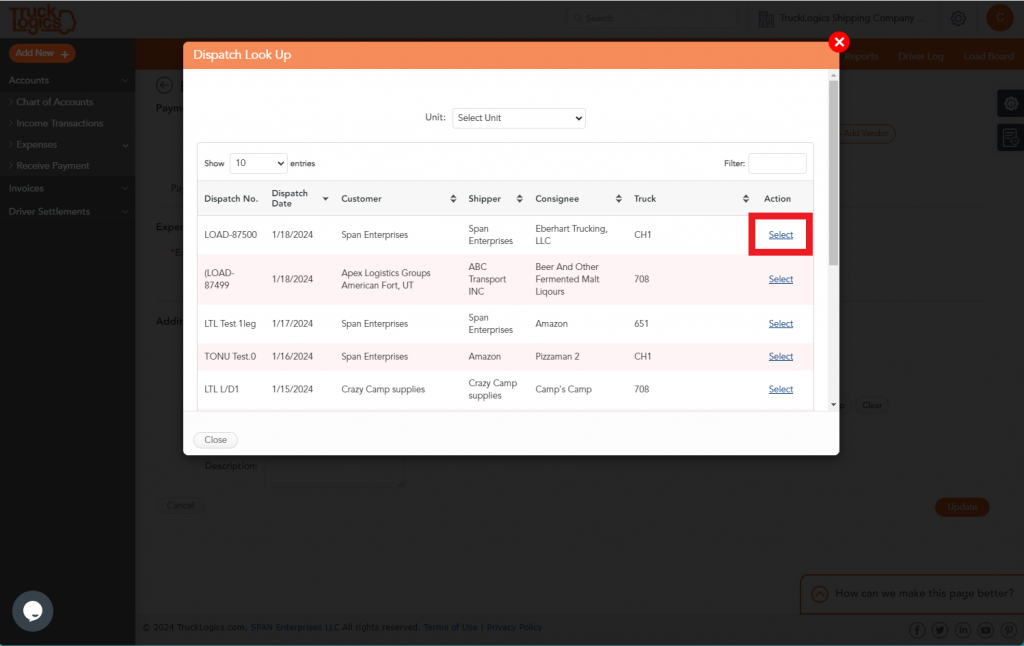
5. Next, you will select the dispatch you want to switch it to.
6. You will then click on the Update button.
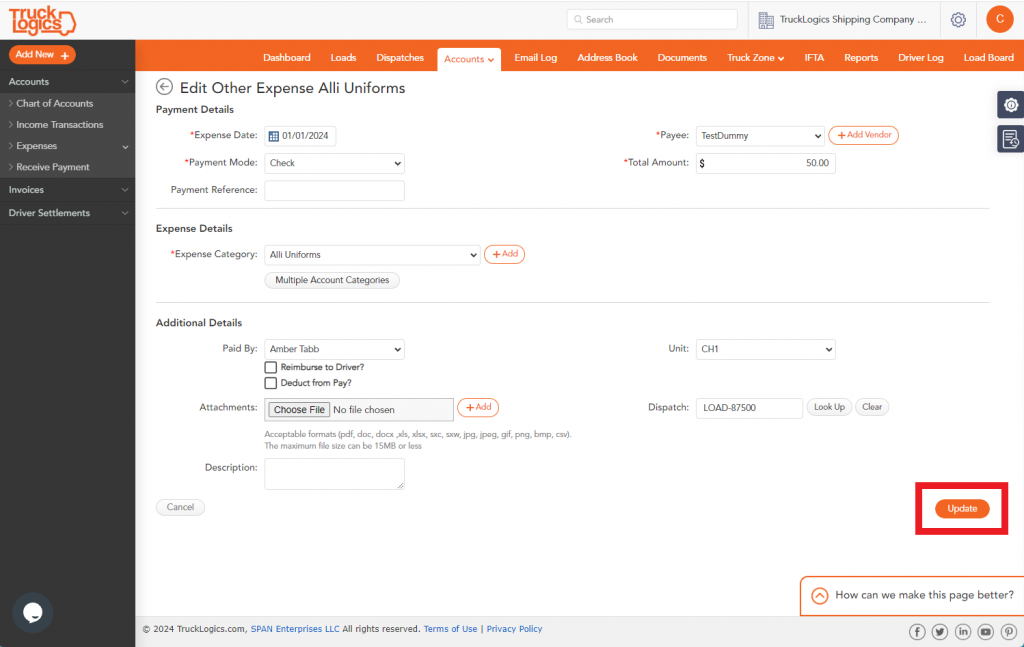
7. This will cause the expense to be switched to a new dispatch.
Next time you accidentally put an expense under the wrong dispatch you can change it with ease in only a few simple steps. Sign up for a 7-day free trial TruckLogics today and be able to update and change expenses with ease!
Leave a Comment