How-To Tuesday: How to Enter in a Canadian or Mexican Address
reading time: 3 minute(s)
TruckLogics offers plenty of awesome features to help make the operations of any trucking business run smoothly. One of these great features is the ability to enter Canadian or Mexican addresses.
This is helpful when there is a customer that lives either in Canada or Mexico and you need to enter their address. Learn how to enter a Canadian or Mexican address in TruckLogics in a few easy steps.
How To Enter A Foreign Address
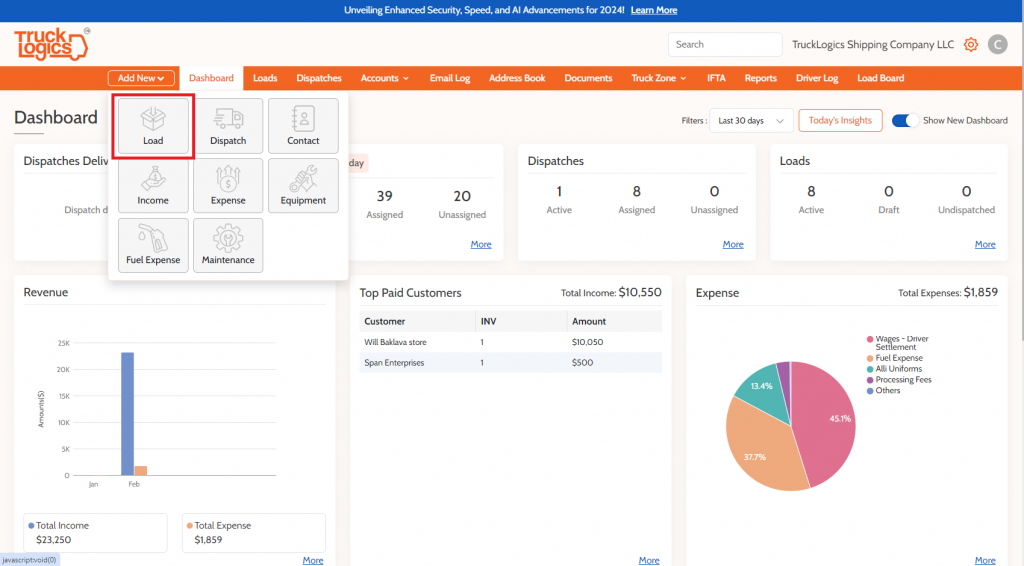
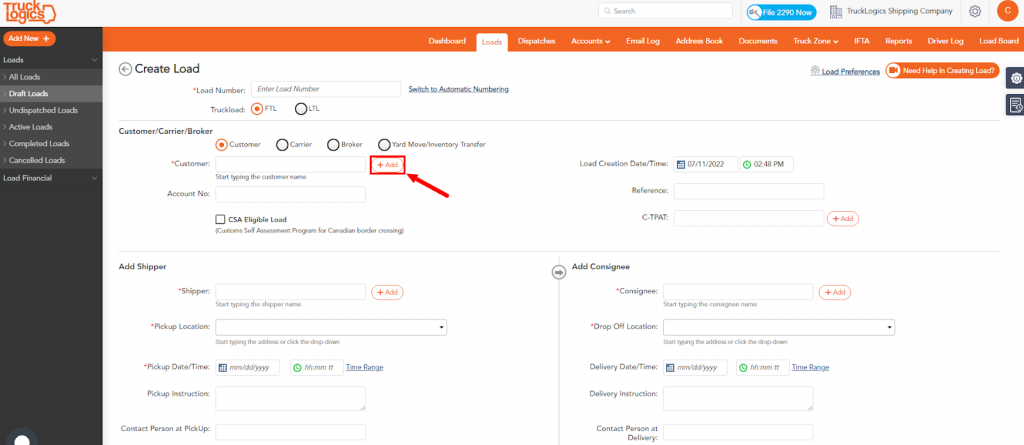
1. From the dashboard in TruckLogics, click the Add New button and then select either Load or Dispatch.
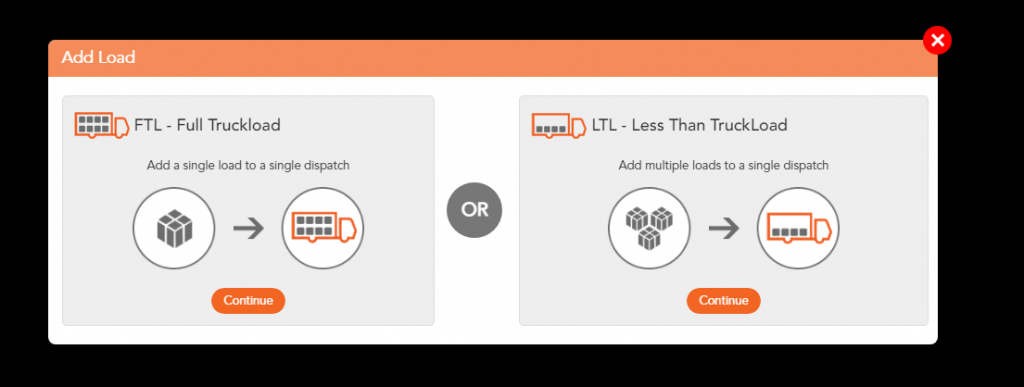
2. If you select Load select which kind of Load you want to create.
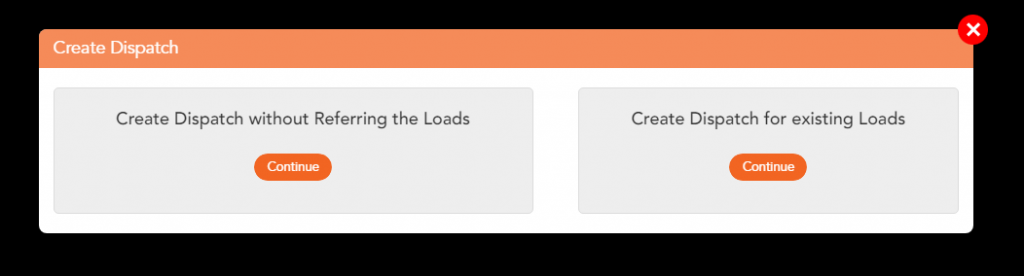
3. If you select Dispatch, select how you would like to create the dispatch.
4. Once you select the option, this is applicable to both options. You will select +Add.
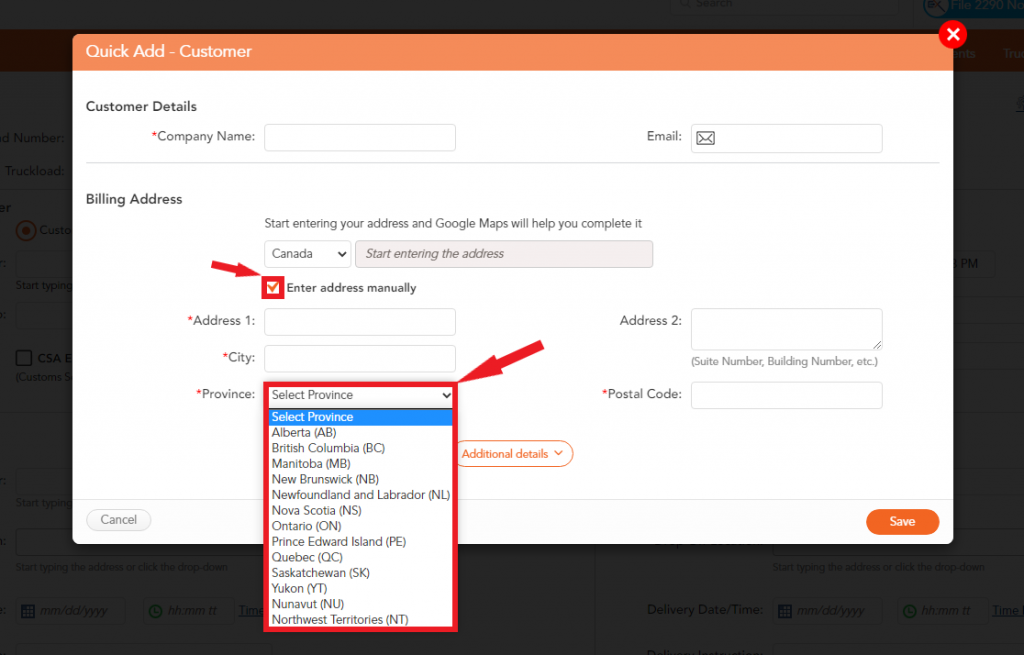
5. You will then go to the drop-down and select the country the address you want to add is located.

6. Once you select a country, select “Enter address manually” to be able to choose what state or province applies to the address you need to enter. The same step also applies to Mexican addresses.
By following these steps in TruckLogics you are able to enter Canadian and Mexican addresses. This feature allows you to enter the address details of customers located in Canada or Mexico. Once you do this you are able to go back to the load or dispatch that you started creating and continue to enter the rest of the required details.
Try TruckLogics Today
Want to take advantage of this amazing feature? What are you waiting for? Sign up for a 7-day free trial and get started with TruckLogics today to start streamlining your trucking business operations.

Leave a Comment