How-To Tuesday: Creating a Load in TruckLogics [Update]
reading time: 3 minute(s)
TruckLogics offers plenty of useful features to help make the operations of any trucking business run smoothly. Creating a load is an essential feature in TruckLogics. Users are able to create FTL (Full Truckload) and LTL (Less Than Truckload) Loads. Using this feature allows you to assign specific drivers and vehicles to loads. In the steps below you will learn how to create a load in your TruckLogics account.
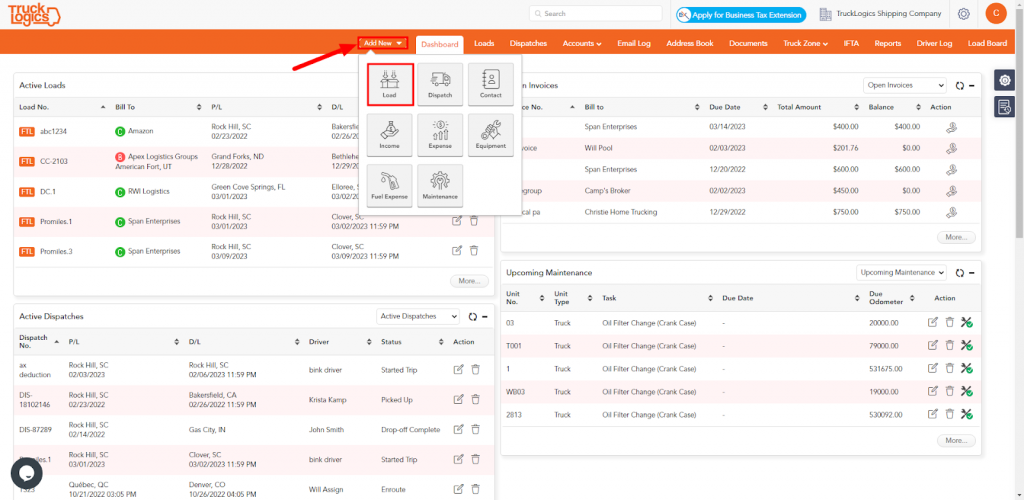
1. From anywhere in your TruckLogics account, click “Add New” and then select “Load” from the drop-down.
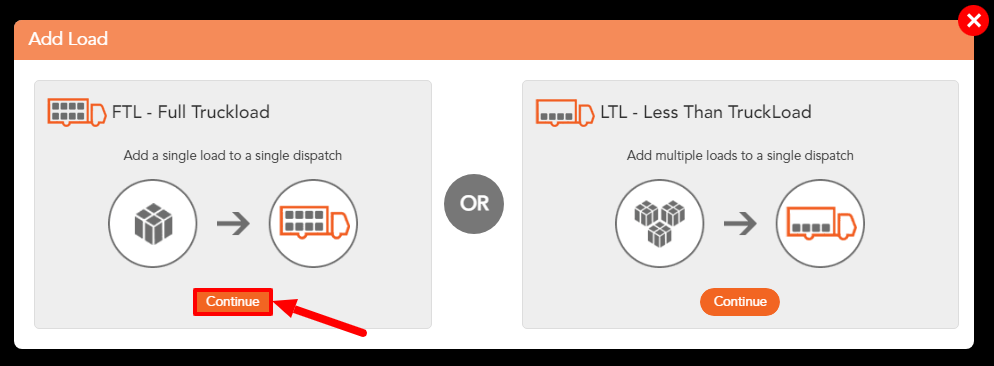
2. You can either select FTL or LTL. Click Continue.
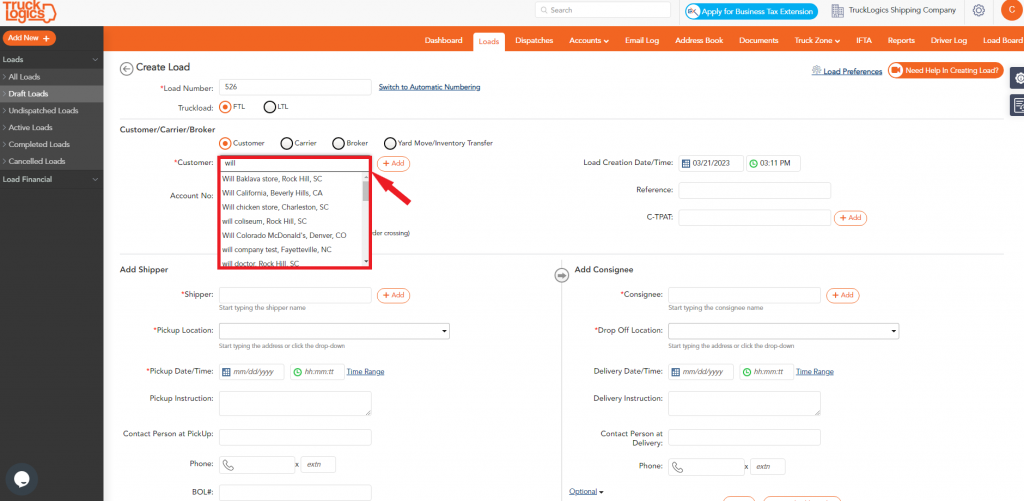
3. Enter the Load Number and Customer information. You can create new contacts to any of these by selecting “+ Add”.
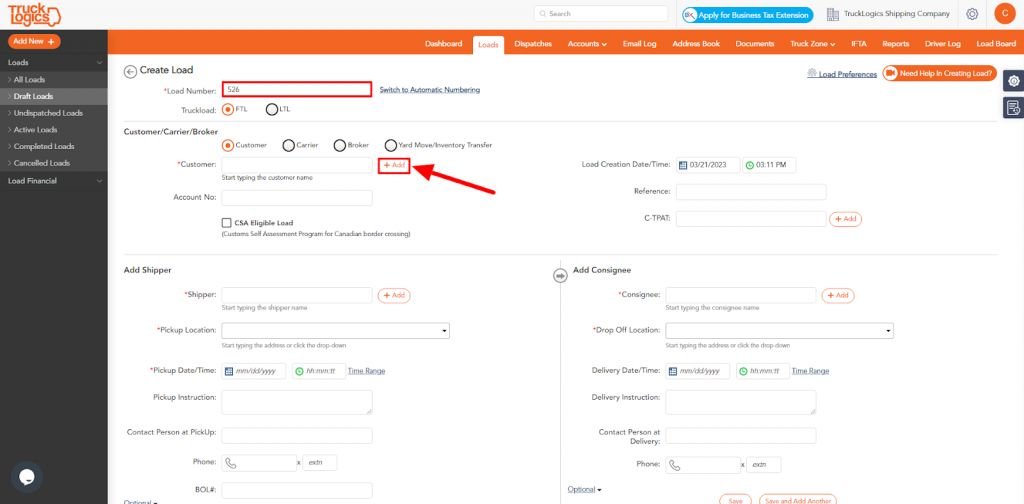
4. You can also search for a specific customer by typing into the box and selecting the customer you want. The same process applies to Consignee.
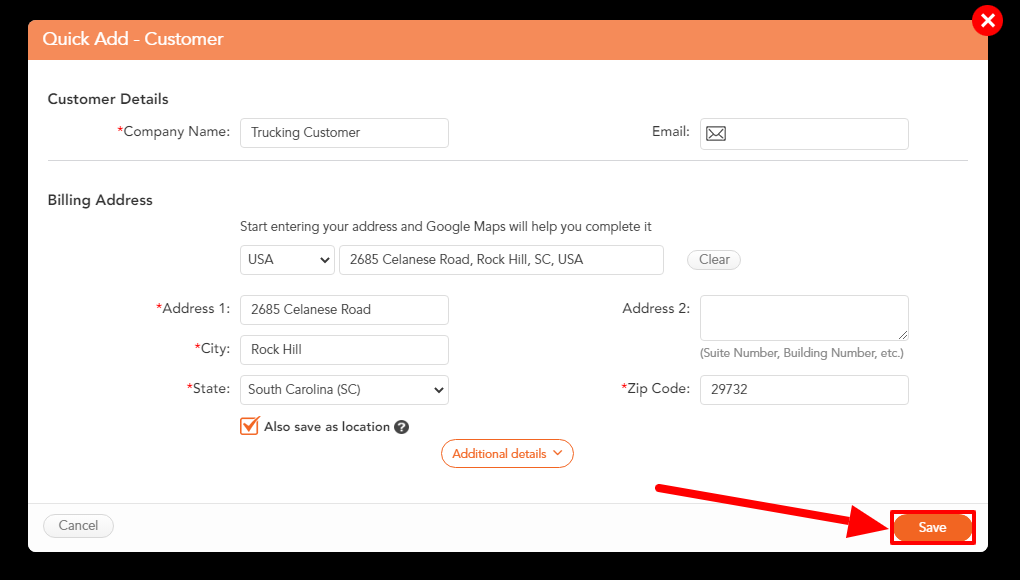
5. If you choose to add a new customer enter the company name, address, and any additional details if needed. Click “Save”. The same process applies to adding new contacts to Consignee.
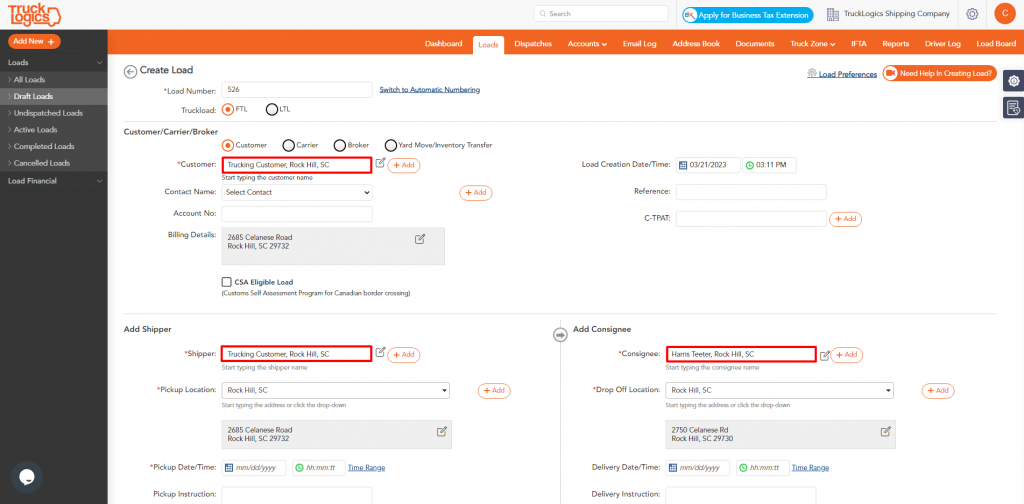
6. Once each is saved you will see your selections in their respective boxes.
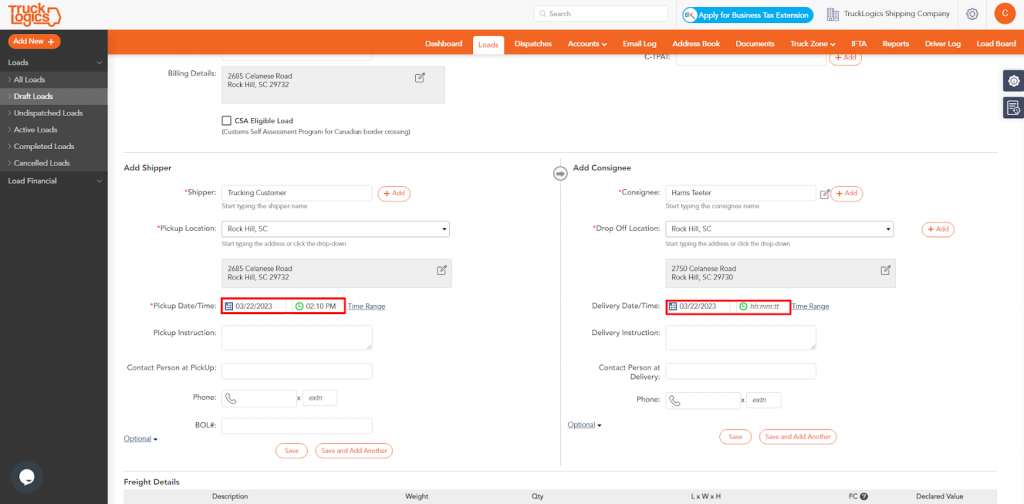
7. Enter “Pickup Date/Time” for the Shipper and the drop-off date and time for the Consignee.
8. Scroll down and enter “Freight Details”. Without a freight description, you will not be able to create a Bill of Lading (BOL) later.
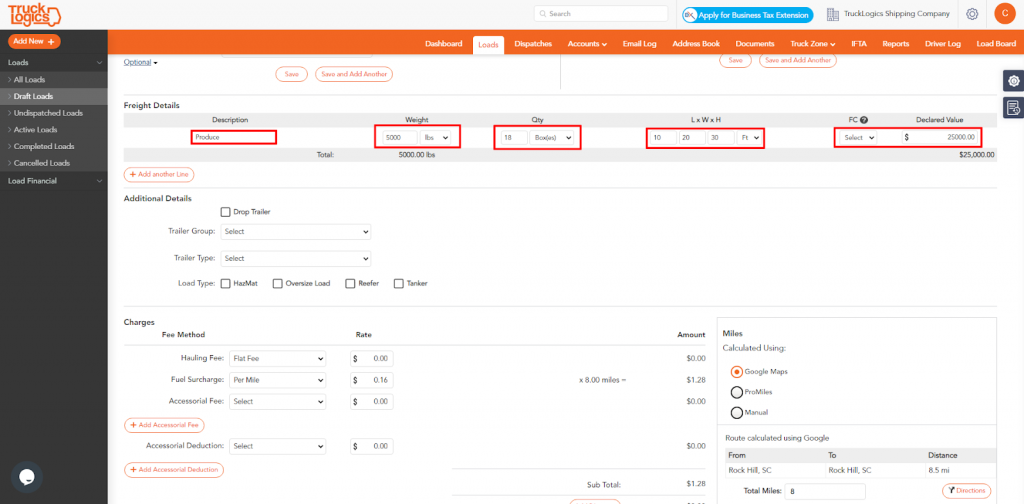
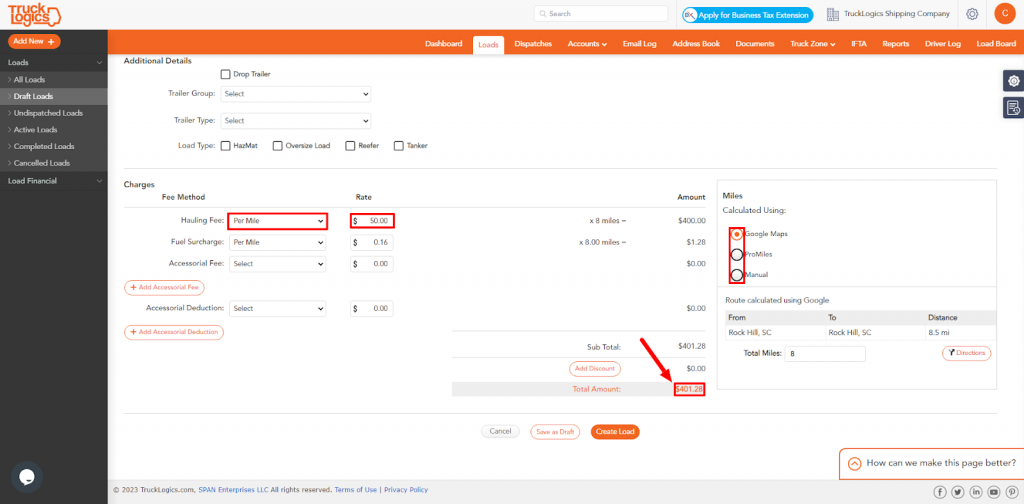
9. Enter the fee information. Enter the fee method, the rate, and how the miles are calculated.
10. Click “Create Load” to generate the load.
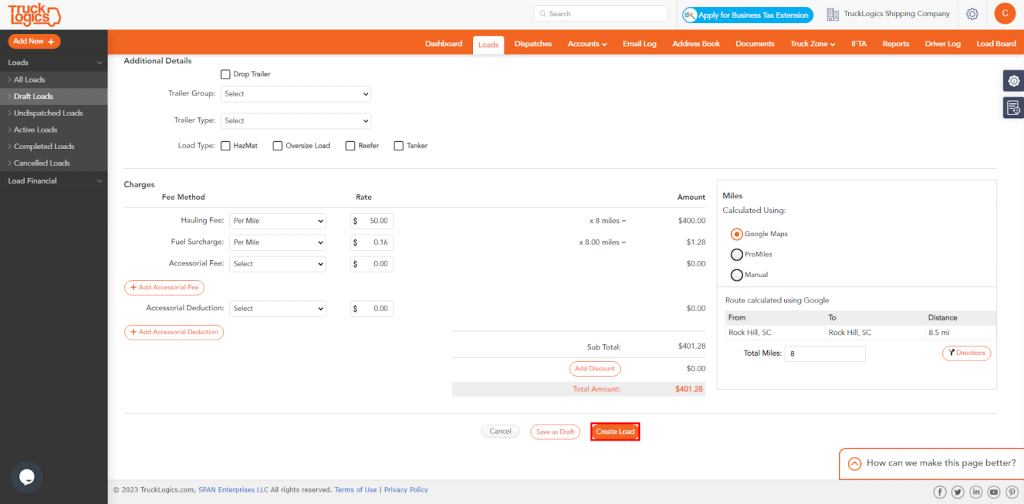
By following these steps in your TruckLogics account, you are able to successfully create a load. You can use the load to create a dispatch, an invoice, or a BOL. What are you waiting for? Start utilizing this useful feature and many more in your TruckLogics account!
Leave a Comment