How-to Tuesday: Creating a Quick Dispatch
With TruckLogics, truck dispatching is easier and more efficient than ever. You can add customers, consignees, freight details, trucks, drivers, and more in minutes.
Here’s how to quickly create a dispatch from the ground up with our truck dispatching software!
Creating a Quick Dispatch
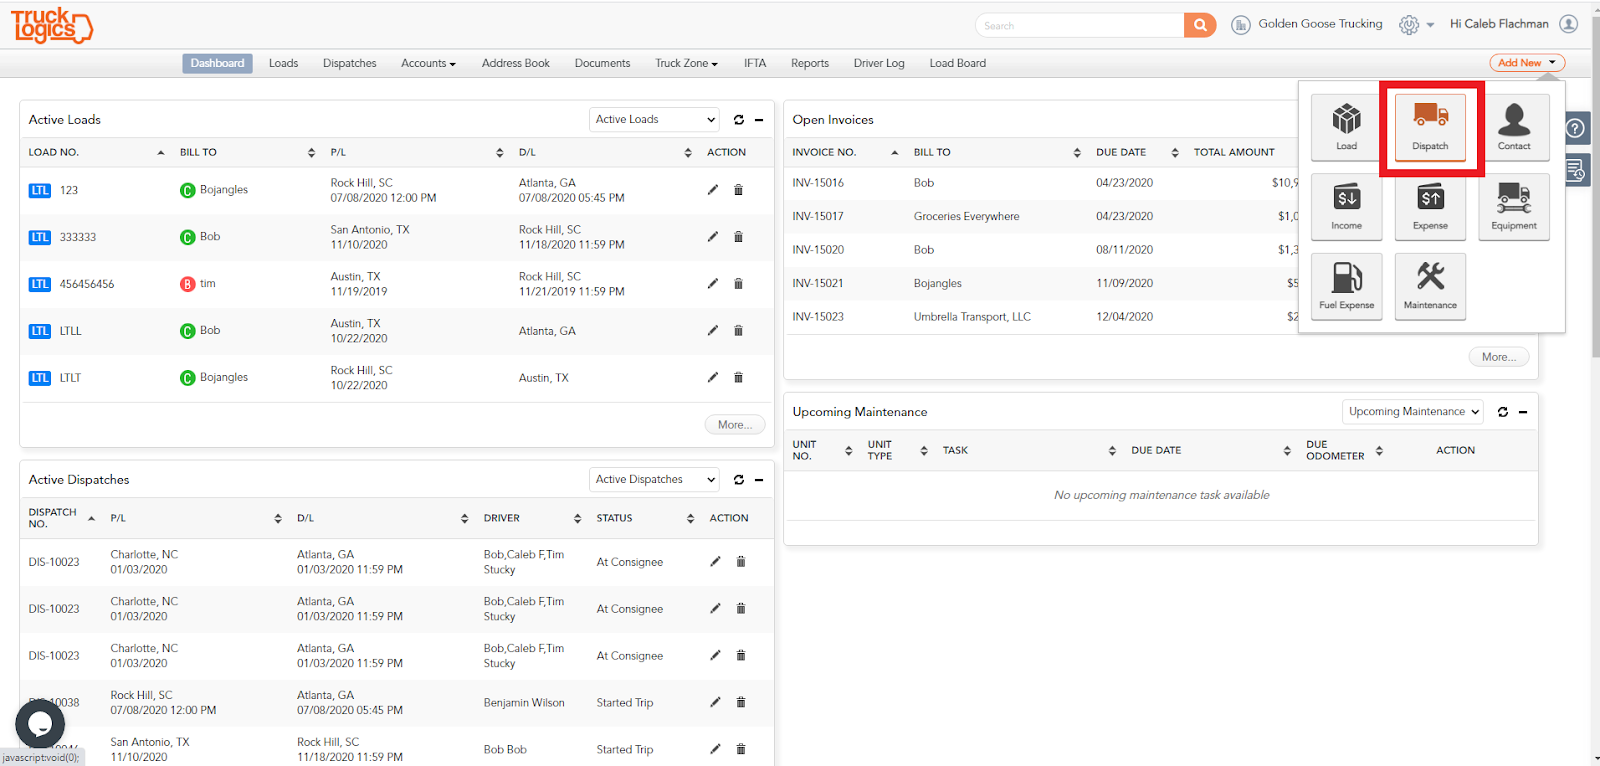
- From your Dashboard, select “Dispatch” from the “Add New” drop-down menu.
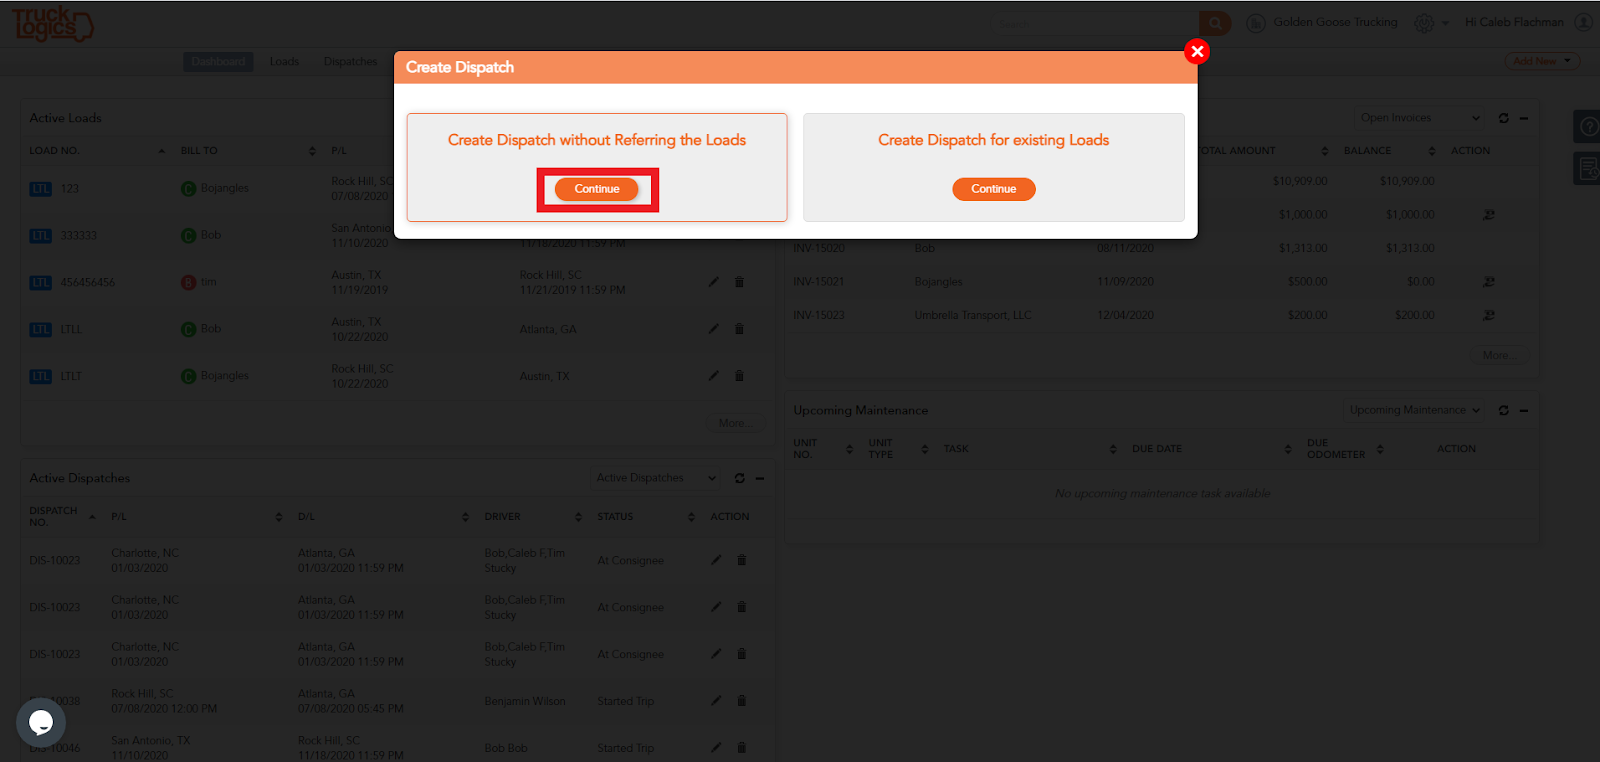
2. Select “Create Dispatch Without Referring the Loads”.
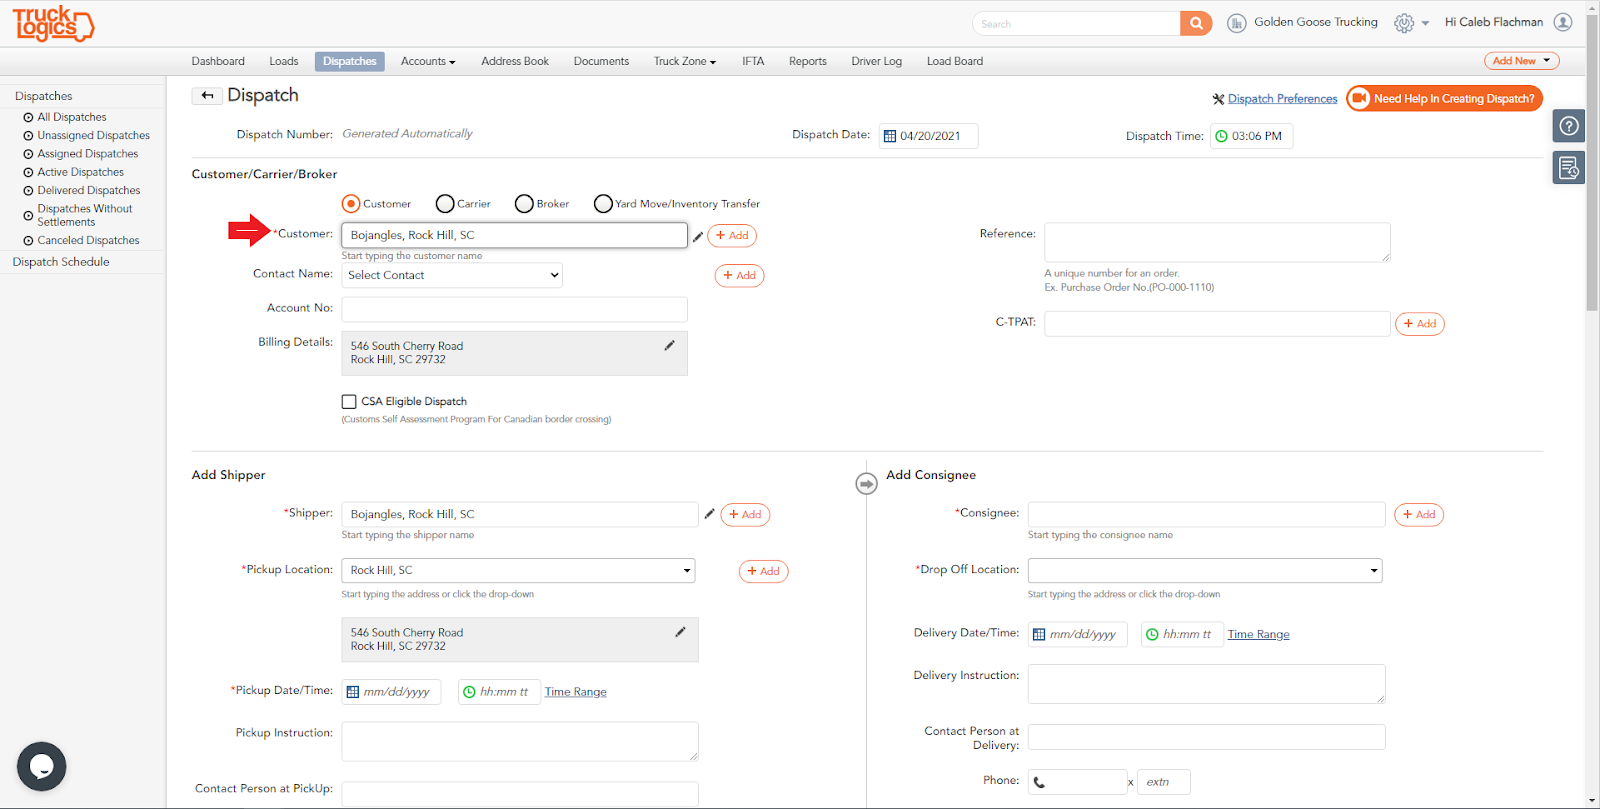
3. If you already have entered a customer before, begin typing the first few letters of their name. The system will pull up their records if they are already in the system.
If you do not have any existing customers, click the “+ Add” button and follow the instructions. By default the customer will also be added as the shipper.
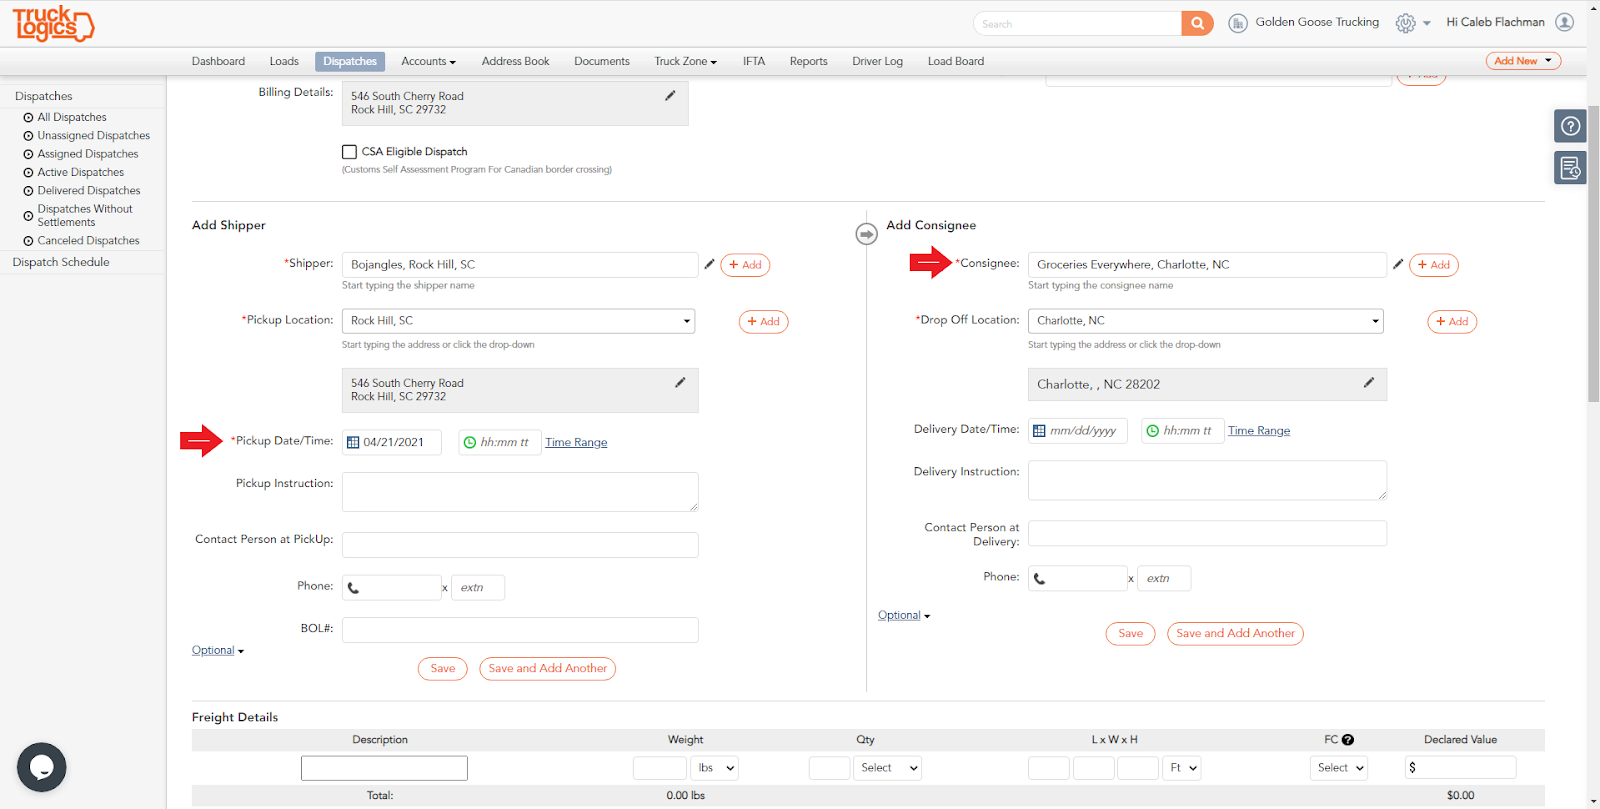
4. Add the Pickup Date/Time and add a Consignee in the same way you added the Customer.
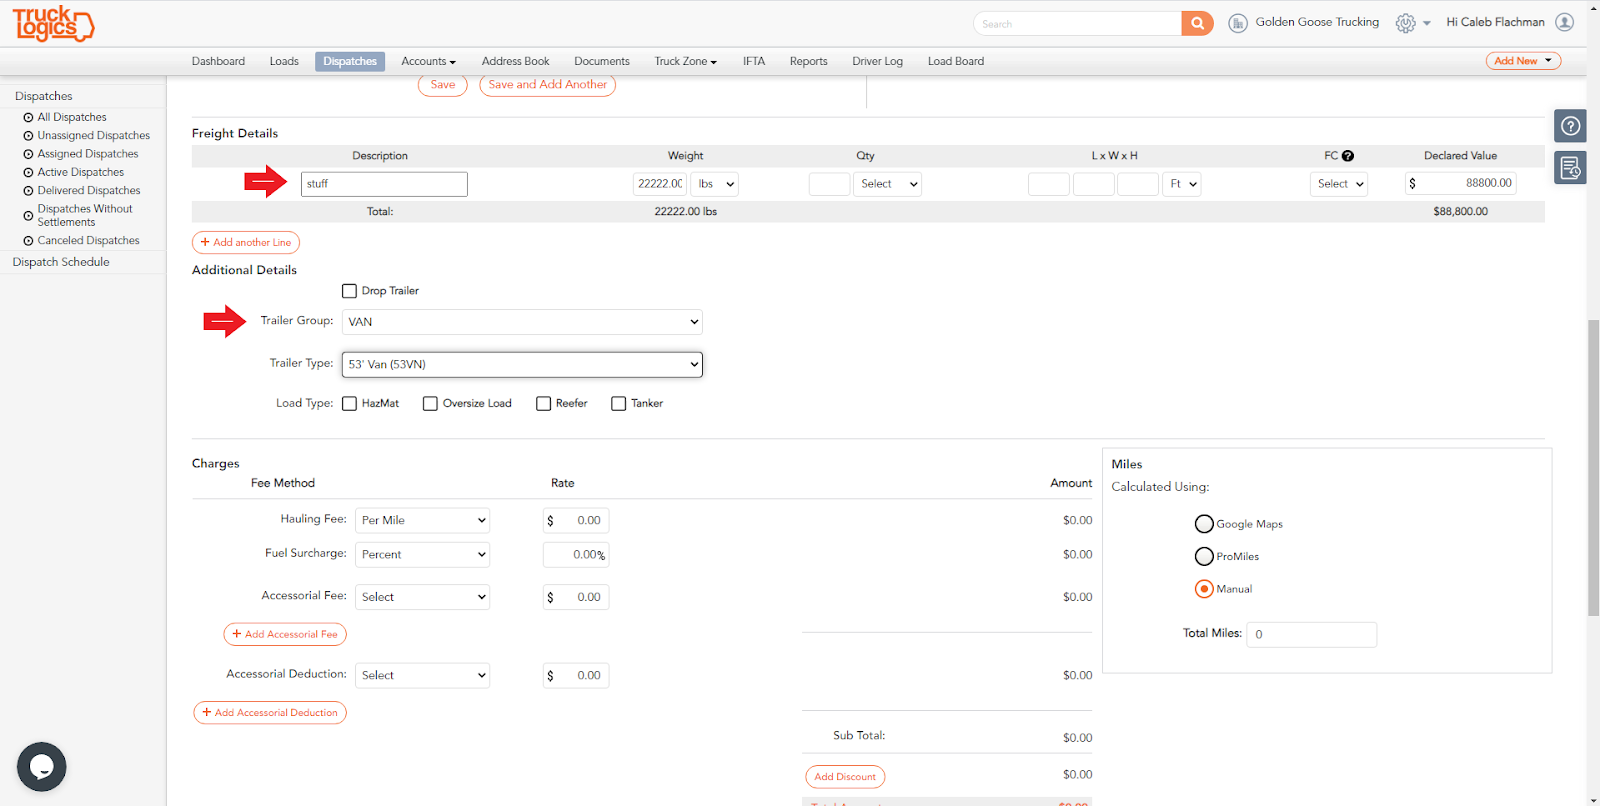
5. Optionally, you can add the Freight Details and Additional Details now.
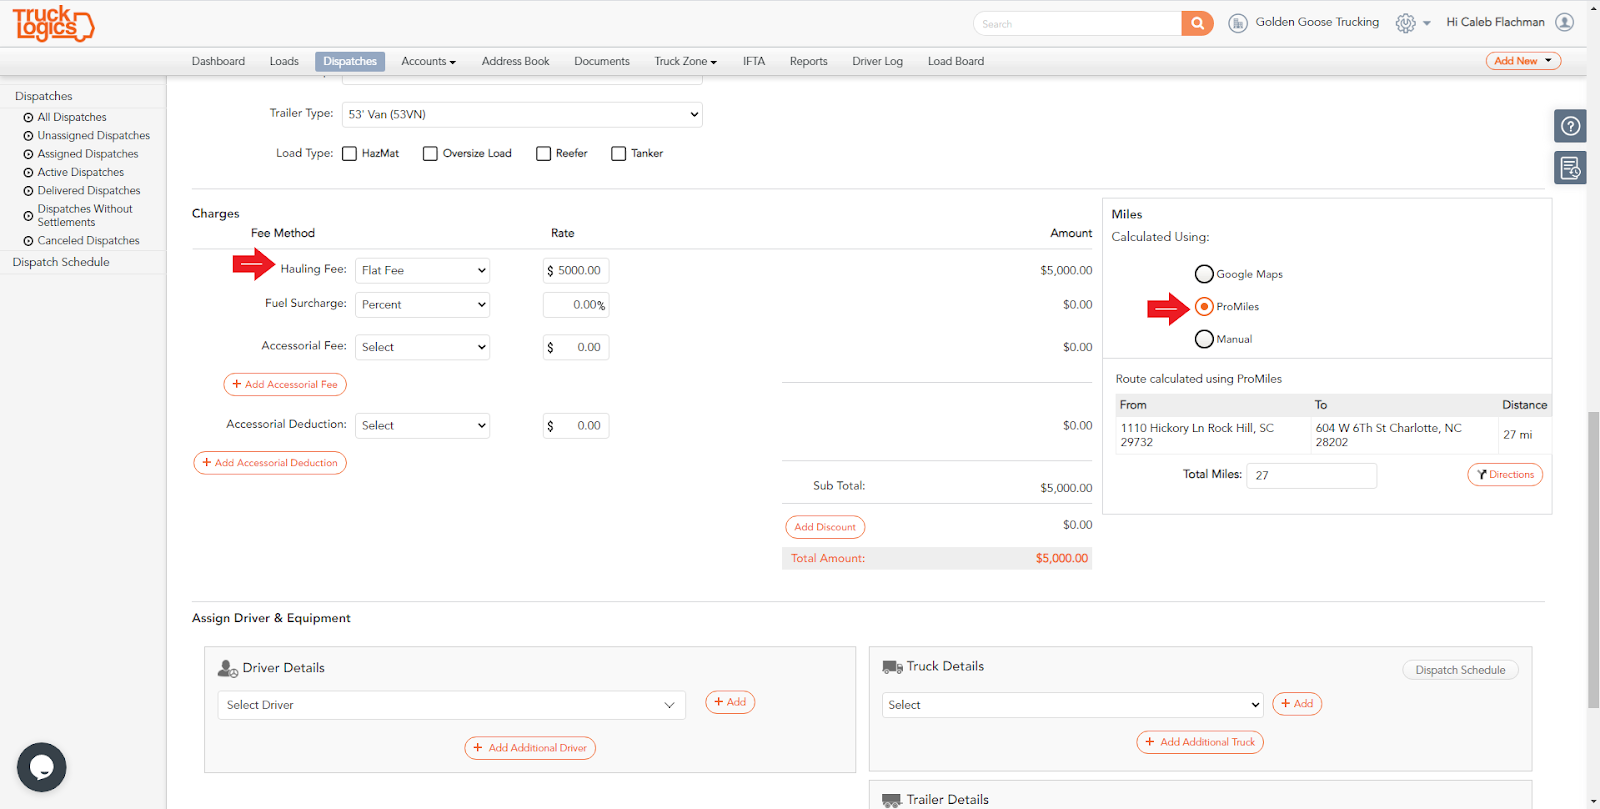
6. Add the Hauling Fee (pay by mile, flat fee, etc.) and any additional fees you bill for. Choose how you want TruckLogics to calculate mileage for this dispatch (Google Maps, ProMiles, or by manual addition).
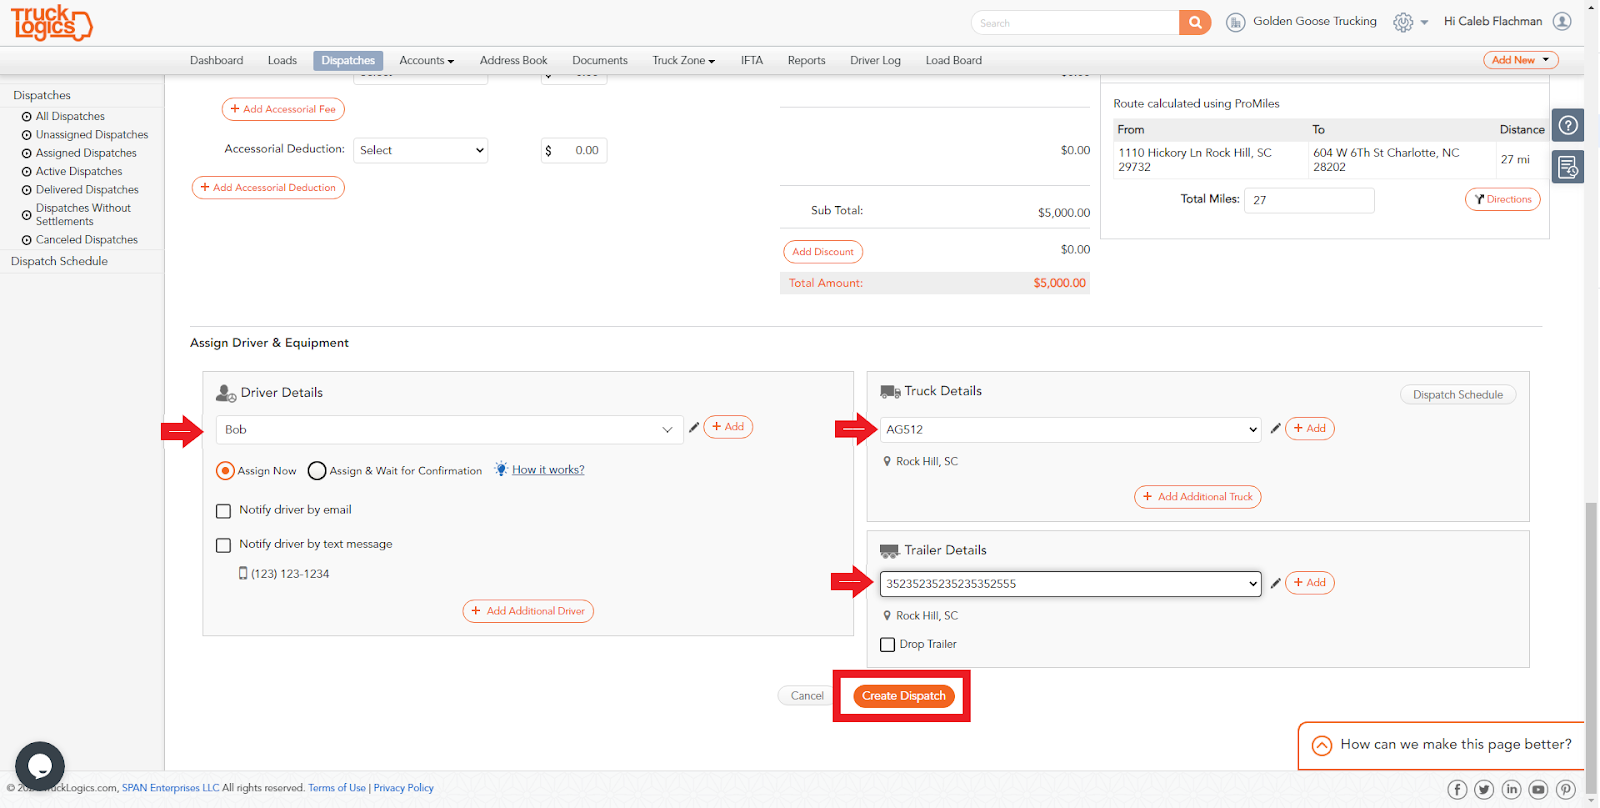
7. Then assign a driver, truck, and trailer. You have several options to notify your driver about this quick dispatch. More about that here.
Click “Create Dispatch” when you are ready to proceed.
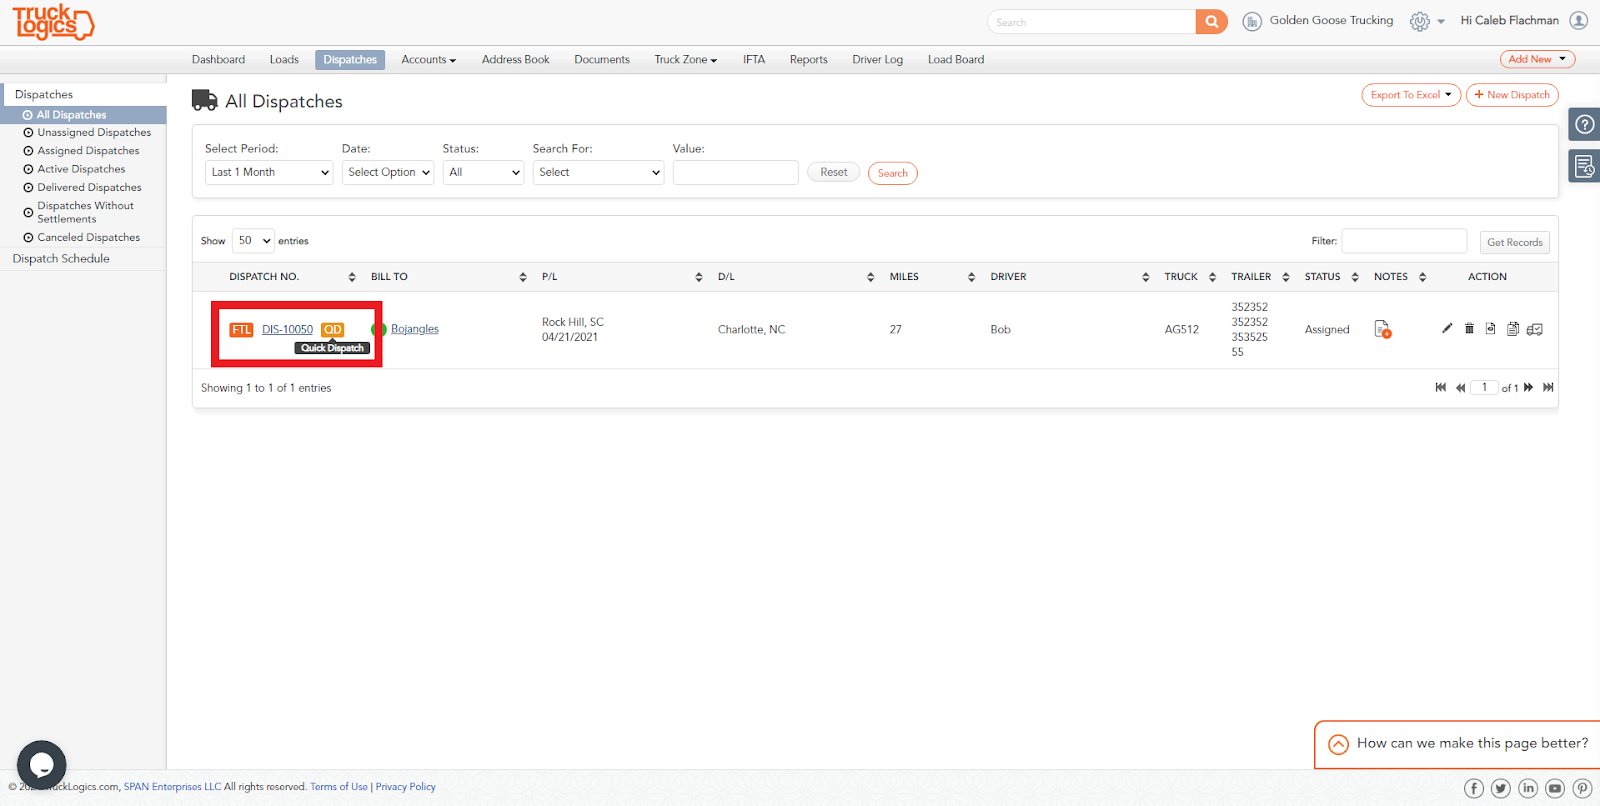
8. Once created you will notice a slight difference in the tabs across the top as a Quick Dispatch is a combination of a load and a dispatch! You will also notice a yellow icon with “QD” next to the dispatch number on your dispatch and loads list. This helps you tell them apart at a glance!
Want to try dispatching in TruckLogics?
You can try our dispatching features today for free! Get your 15-day free trial today! There’s no obligation and no credit card information required.